
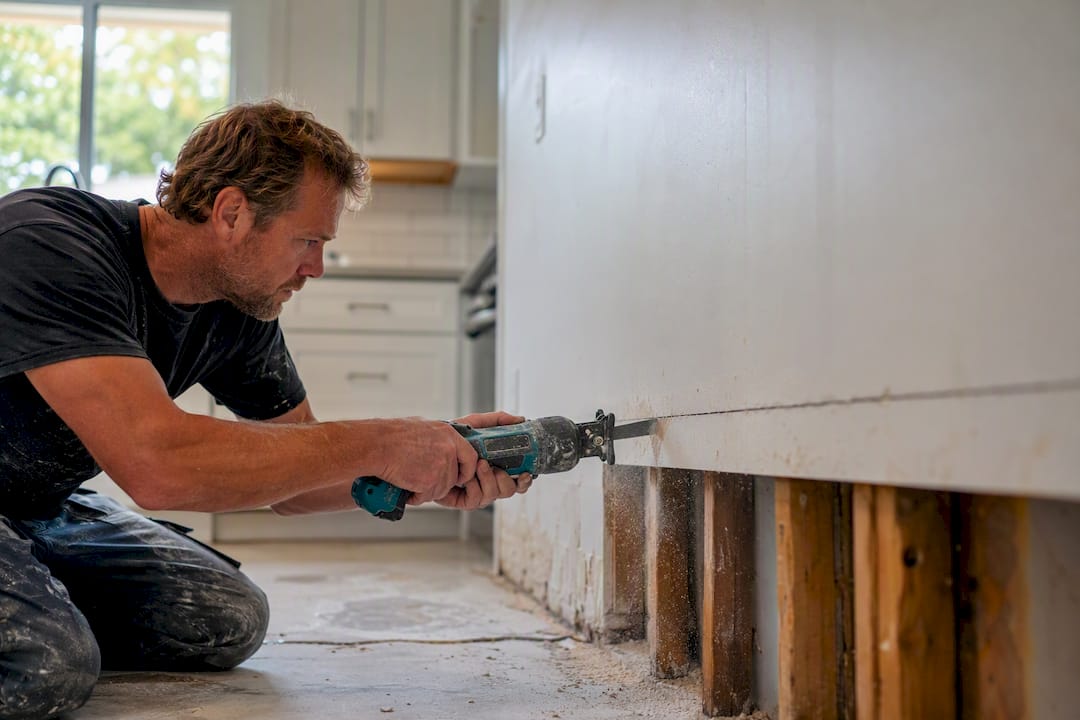
Cut the drywall a modest distance above the highest visible waterline, typically enough to cover the area affected by moisture wick. That’s the working rule for most flooding events, and it’s driven by how far water wicks up through gypsum board before it stops. If the water was gray or black (sewage, floodwater, a backed-up drain), sat for more than 48 hours, or you can already see mold, skip the rule and remove drywall higher, sometimes all the way to the ceiling.
Before anything else: cut power to affected circuits at the breaker and stay out of standing water until an electrician or your own judgment confirms it’s safe. Don’t touch a wall switch with wet hands or wet flooring underfoot.
- Clean water, caught fast: 12 to 24 inches above the waterline
- Gray or black water, or 48+ hours of standing water: full removal, often to the ceiling
- Visible mold or soft, swollen board: replace regardless of height
Pro Tip: Photograph the waterline and take a moisture meter reading before you cut anything. Insurance adjusters and contractors both want that baseline, and you can’t recreate it once the wet section is in a trash bag.
Key Takeaways
A flood cut removes drywall 12 to 24 inches above the waterline in most clean-water cases, but Category 3 contamination, prolonged standing water, or visible mold always overrides that rule in favor of full removal.
| Point | Details |
|---|---|
| Standard cut height | Mark 12 to 24 inches above the highest visible waterline for typical clean-water losses. |
| Water category decides scope | Category 2 or 3 water, or standing water past 48 hours, usually means full removal instead. |
| Mold window is short | Mold risk climbs sharply once materials stay wet for roughly 24 to 48 hours. |
| Moisture readings beat guessing | Confirm your cut line with a moisture meter reading, not just a visual estimate. |
| Call a pro for contamination or structural risk | Infinityrestoration handles moisture mapping, documented drying, and insurance paperwork when the damage exceeds a DIY fix. |
Table of Contents
- What Is a Flood Cut and Why Does It Matter?
- When Is a Flood Cut Necessary?
- How Much Drywall Should You Cut?
- How to Flood Cut Drywall: A Step-by-Step Procedure
- How Long Does It Take to Dry, and What’s the Mold Risk?
- Rebuilding: Replacing Drywall After a Flood Cut
- When Should You Call a Restoration Professional?
- What Homeowners Get Wrong About Flood Cuts
- Get Professional Help After Water Damage in Orlando
- Frequently Asked Questions
- Sources
What Is a Flood Cut and Why Does It Matter?
A flood cut is the controlled removal of a horizontal band of drywall, starting at the floor and running up to a measured height above the waterline, to open the wall cavity for inspection and drying. It’s not demolition for its own sake. Wet insulation and hidden framing behind an intact wall are exactly where mold grows unseen, and you can’t dry what you can’t reach.
The goal isn’t a tidy-looking wall. It’s hitting a documented dry standard for the studs, plates, and any remaining material, which is the actual benchmark restoration professionals work toward under IICRC guidelines.
- Removes contaminated or saturated material that won’t dry in place
- Exposes insulation and framing so air movers and dehumidifiers can actually reach them
- Lets you (or an inspector) see the true extent of damage before closing the wall back up
When Is a Flood Cut Necessary?
Three things drive the decision: what kind of water it was, how long it sat, and what your moisture meter tells you. Clean water from a burst supply line, caught within a day, behaves very differently than backed-up sewage that sat overnight.
Water gets classified into categories for a reason. Category 1 is clean (a supply line break). Category 2 is “gray water” with some contamination (a washing machine overflow). Category 3 is grossly contaminated: sewage, floodwater, or anything that’s been sitting long enough to grow bacteria. Home Depot’s gypsum assessment guidance notes that mold risk climbs sharply once material sits wet beyond a day or two, and gypsum should be replaced unless every condition for salvage is met.
Run through this on-site before you decide anything:
- Identify the highest point water reached (mark it with tape or a pencil line)
- Determine the water category (clean, gray, or black/contaminated)
- Check moisture readings above and below the visible line, not just at it
- Inspect insulation, it rarely survives contact with water and almost never dries in place
- Note any musty smell or visible mold growth, either one ends the debate
Category 3 water, standing water past 48 hours, or visible mold all mean removal isn’t optional.
How Much Drywall Should You Cut?
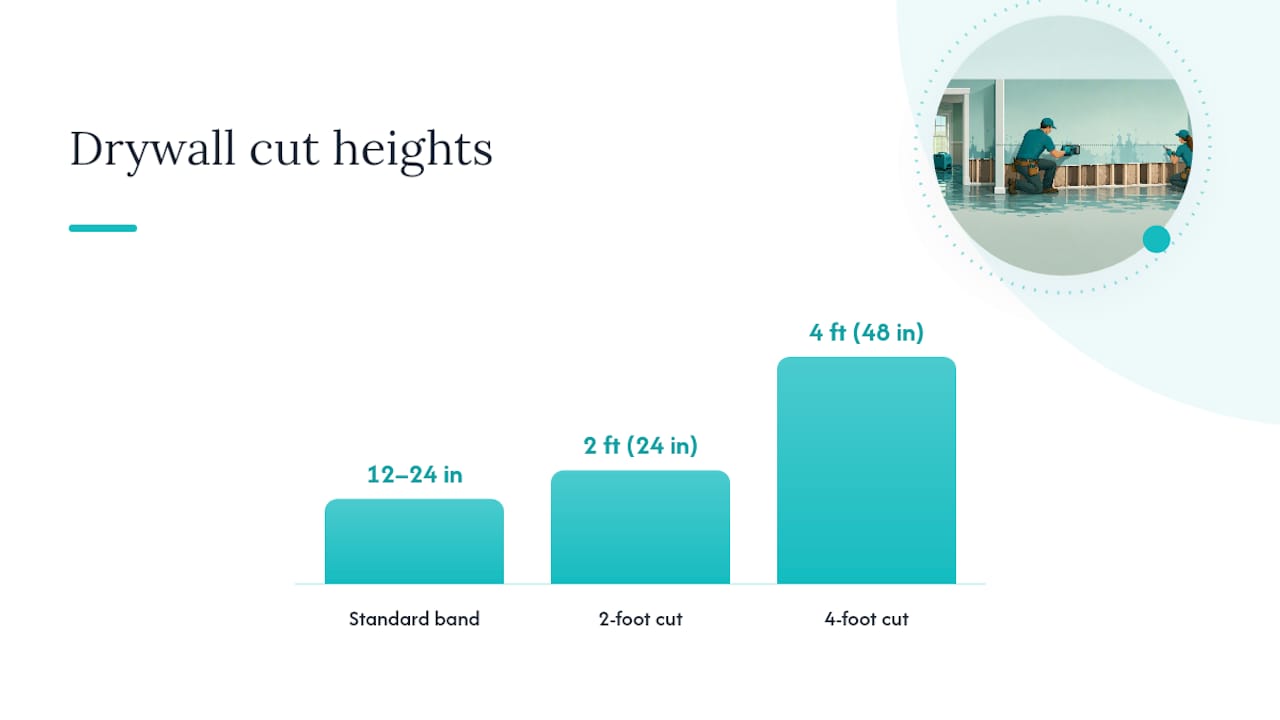
Twelve to 24 inches above the highest visible waterline is the standard band, but that range exists because gypsum doesn’t wick water to a perfectly consistent height every time. Board composition, how long the water sat, and whether the wall cavity trapped humidity all shift where “dry” actually starts. That’s why a moisture meter matters more than a tape measure alone. The IICRC S500 standard backs this up directly: it treats removal as a decision driven by documented moisture readings, not a fixed cut height.
In practice, three heights show up most often:
- 2-foot cut: typical for clean water losses caught within a day, minor kitchen or bathroom leaks
- 4-foot cut: common when exposure ran longer, or because it matches a standard sheet width and simplifies the rebuild
- Full removal: standard for Category 3 water, heavy contamination, or when moisture readings stay elevated well above 24 inches
Mark your line, measure from the documented waterline (not a guess), and photograph both before cutting. Watch for electrical boxes sitting just above your planned cut line. If a box falls inside the wet zone, an electrician needs to look at it before you patch around it. Old plaster-and-lath walls sometimes make full-panel replacement simpler than trying to feather a clean cut line into deteriorating material; a plastering specialist can tell you if salt contamination in old plaster is forcing a bigger job than the drywall alone would.
How to Flood Cut Drywall: A Step-by-Step Procedure
Confirm power is off to any circuit touching the affected wall before you pick up a tool. Wear an N95 or better respirator, gloves, eye protection, and boots. If the water was contaminated, ventilate the space before you start cutting.
Tools you’ll need: utility knife, oscillating multi-tool or drywall saw, flat pry bar, moisture meter, heavy contractor trash bags, and painter’s tape for marking lines.
- Photograph the waterline and take initial moisture readings
- Remove baseboards and trim carefully, you can often reuse them
- Mark your cut line using a level and the height you determined above
- Cut along the line, stopping at the nearest wall stud on each side
- Pull the wet drywall away from the studs with the pry bar
- Remove and bag wet insulation immediately, it won’t dry in place and holding onto it just delays the job
- Take fresh moisture readings at several heights in the open cavity
- Position air movers and a dehumidifier to start drying the exposed studs and plates
Pro Tip: Sweep a non-penetrating moisture meter up the open cavity first to find where the reading drops to normal, then confirm with a penetrating probe just above your planned cut line. If it’s still reading wet an inch above where you meant to stop, move the line up before you close anything back in.
If the wall framing feels soft, structural members are saturated, or you spot mold once the cavity’s open, stop. That’s a signal to bring in a professional rather than push forward.
How Long Does It Take to Dry, and What’s the Mold Risk?
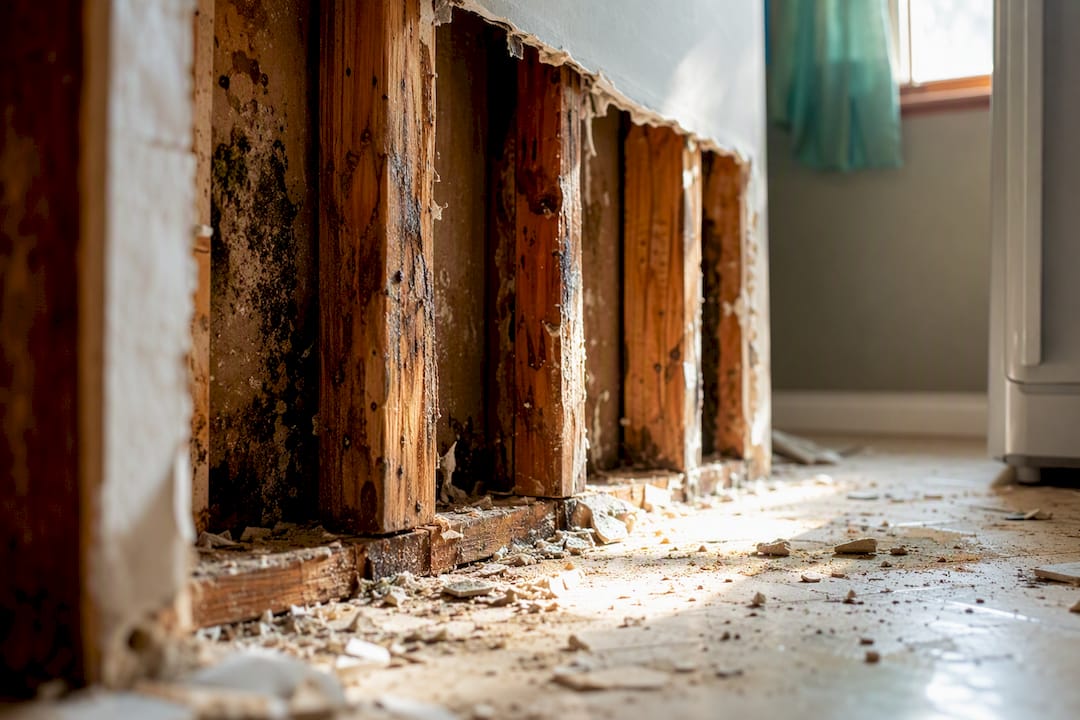
Mold can start colonizing wet building material within a short period after water exposure, which is why speed matters more than perfection here. EPA guidance is direct on this: controlling humidity and drying materials fast are the two moves that actually prevent mold growth, not sealants or spot treatments.
Once the cavity is open, the drying setup is straightforward:
- Air movers aimed to circulate air across exposed studs and plates, not just blow into open space
- A dehumidifier, ideally a low-grain-refrigerant unit, running continuously in the affected room
- Daily moisture readings logged at the same spots so you can see the trend, not just one snapshot
FEMA’s guidance on flood-resistant materials is blunt about gypsum exposed to sewage or floodwater: it must be replaced, and when there’s any doubt about contamination, replacement is the safer call over trying to dry and save it.
Rebuilding: Replacing Drywall After a Flood Cut
Don’t hang new drywall until moisture readings across the open cavity meet a documented dry standard, not just “it feels dry to the touch.” If an antimicrobial treatment was applied, give it the manufacturer’s full cure time first.
- Replace insulation entirely; wet fiberglass or cellulose loses its R-value and won’t perform even after drying
- If you removed a full 4-foot sheet width, hanging new board is simple; a partial-height cut may need blocking behind the seam for a solid nailing surface
- Tape, float, and texture corner-to-corner or wall-to-wall rather than just patching the cut line, patch lines show through paint more often than people expect
- Prime and paint the full wall section so sheen and texture match
When Should You Call a Restoration Professional?
Call a pro immediately if the water was Category 2 or 3, standing water sat longer than 48 hours, framing or bottom plates feel wet or soft, or you can see mold growth. These are the situations where DIY drying tends to fail quietly, behind a wall you’ve already closed back up.
A qualified contractor brings moisture mapping, documented meter readings at every stage, proper disposal of contaminated material, and the paperwork your insurance adjuster will want to see. Before hiring anyone, ask for IICRC-compliant procedures, before-and-after moisture logs, and a written scope of work. If you’re not sure whether your situation crosses that line, Infinityrestoration’s emergency response guidance walks through the same triggers in more detail.
What Homeowners Get Wrong About Flood Cuts
Most people treat the 12 to 24 inch rule like a law instead of a starting point, and that’s where DIY jobs go sideways. The number exists because it covers the majority of quick, clean-water losses, not because gypsum magically stops wicking at exactly two feet. If your moisture meter reads wet at 30 inches, the rule doesn’t protect you, the reading does.
The bigger blind spot is timing. Homeowners often spend the first critical hours deciding whether the damage is “bad enough” to justify tearing into a wall, and that hesitation is exactly what turns a manageable Category 1 loss into a mold problem. The IICRC framework isn’t really about cut height at all, it’s about documentation and moisture data driving every decision, which is a more useful mindset than memorizing a number.
If there’s one thing worth prioritizing, it’s this: cut fast when the water is clean, but never guess when the water is contaminated. That’s the line between a weekend repair and a job that needs a licensed remediation team.
Get Professional Help After Water Damage in Orlando
If your flood cut turned up soft framing, a lingering odor, or water that came from a contaminated source, this isn’t a project to finish alone. Infinityrestoration is the local alternative to guessing your way through drying and rebuild decisions: our team uses documented moisture mapping and a Florida Licensed Mold Assessor to confirm exactly how far the damage traveled before anyone closes a wall back up.

That documentation isn’t just for your own peace of mind. It’s what insurance adjusters ask for, and having it ready from day one speeds up claims that otherwise stall for weeks. Infinityrestoration runs 24/7 emergency response across the Orlando area, so a storm-related flood cut at 2 a.m. gets the same response as one at noon. If you’re staring at an open wall cavity right now and aren’t sure whether it’s salvageable, request an assessment for your water damage and get moisture readings and a written scope before you make the call yourself.
Frequently Asked Questions
What is a flood cut in drywall repair?
It’s the removal of a horizontal section of drywall from the floor up to a measured height above the visible waterline, done to expose wet insulation and framing for inspection and drying.
How high should you cut drywall after water damage?
Twelve to 24 inches above the highest waterline covers most clean-water losses. Contaminated water, prolonged flooding, or visible mold usually call for a higher cut or full removal.
Can wet drywall be saved instead of replaced?
Sometimes, if it stayed clean and gets dried within roughly 24 to 48 hours with meter readings confirming it. Swollen, discolored, or contaminated drywall should be replaced.
Do you need a professional for a flood cut?
Not always for small, clean-water losses you catch quickly. Contaminated water, extended standing water, wet framing, or visible mold are all reasons to bring in a licensed restoration contractor.
How long does drywall take to dry after a flood cut?
With air movers and a dehumidifier running continuously, exposed framing often reaches a documented dry standard within a few days, though humidity, material type, and cavity size all affect the timeline.
Sources
- IICRC: Standards and Reference Publications
- Assessing the need for replacement of gypsum board (Home Depot technical brief)
- EPA: Mold resources and prevention guidance