
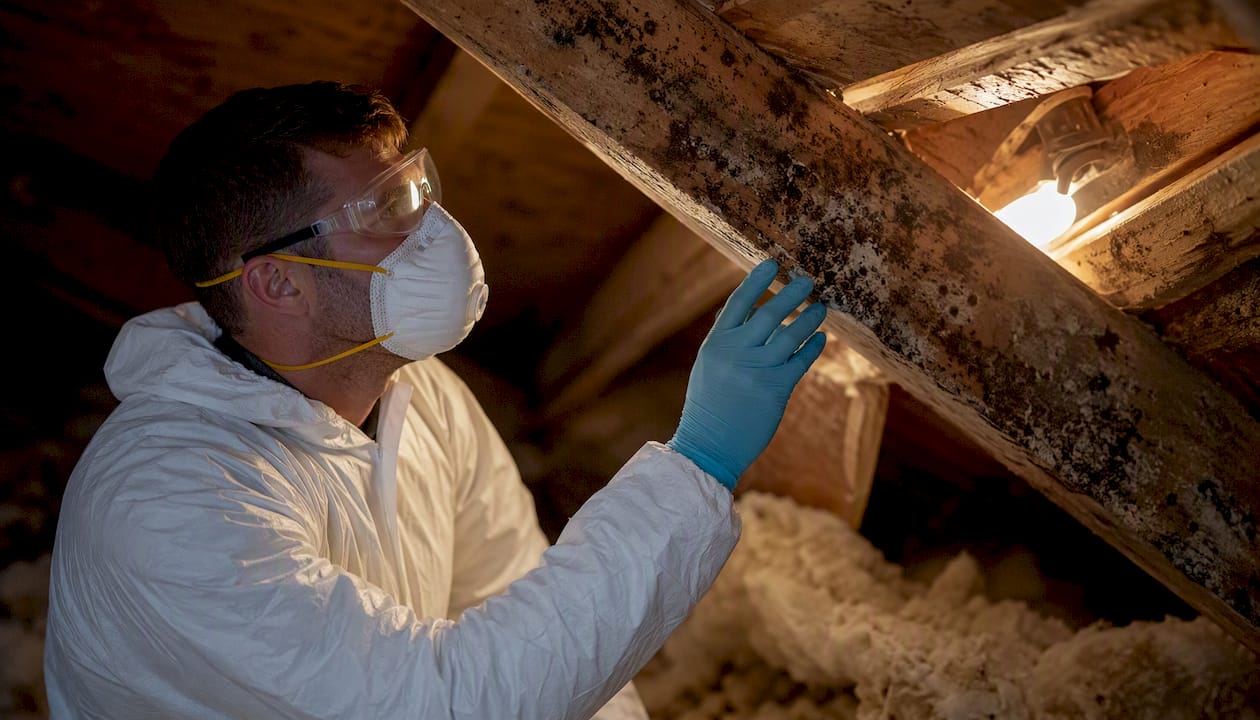
Yes, attic mold can be removed, but the honest answer depends on scope. Small, dry patches on nonporous surfaces are fair game for a homeowner following EPA cleanup guidance. Anything larger, anything on porous wood sheathing, or anything tangled up in your insulation calls for a professional crew with containment gear and a plan.
Before you do anything else: stop the water source if you can safely reach it, avoid touching or disturbing the moldy area, and take photos from multiple angles for your records. Put on an N95 respirator, gloves, and eye protection if you’re going up there at all.
Here’s your quick math: DIY supplies for a genuinely small patch run $50 to $300. Professional attic remediation typically lands between $1,500 and $6,000, and jobs requiring sheathing replacement can climb past $10,000. The EPA’s dividing line is about 10 square feet. Above that, call a professional.
Key Takeaways
Attic mold remediation succeeds only when the moisture source gets fixed first and a third party independently verifies the cleanup worked.
| Point | Details |
|---|---|
| Know the DIY limit | The EPA’s roughly 10 square foot guideline marks where homeowner cleanup ends and professional remediation begins. |
| Fix the source first | Roof leaks, blocked vents, and misdirected exhaust fans cause regrowth if left unaddressed after cleaning. |
| Budget realistically | Professional remediation typically runs $1,500 to $6,000, with sheathing replacement pushing costs past $10,000. |
| Insist on clearance testing | Independent air or surface sampling confirms the job worked instead of trusting the remediator’s own word. |
| Document everything | Photos, moisture readings, and contractor scopes protect you if you file an insurance claim later. |
| Call a licensed assessor | Infinityrestoration pairs a Florida Licensed Mold Assessor with moisture mapping and real-time documentation for Orlando-area attics. |
Table of Contents
- What Causes Attic Mold in the First Place
- What Attic Mold Looks Like and How to Check Safely
- Should You Handle It Yourself or Hire a Pro?
- Inside a Professional Attic Mold Remediation Project
- What Attic Mold Remediation Costs and Why
- Why Third-Party Clearance Testing Matters
- Stopping Attic Mold From Coming Back
- What the Safety Data Says About DIY Attic Work
- Why Fixing the Leak Matters More Than Cleaning the Mold
- When to Call Infinity Restoration for Attic Mold
- Frequently Asked Questions
- Sources
What Causes Attic Mold in the First Place
Mold needs three things: moisture, organic material, and stagnant air. Your attic usually supplies all three if something’s gone wrong with ventilation or water control.
- Roof leaks. A cracked flashing or missing shingle lets water in steadily, and it often means the wet plywood or rafters underneath need replacing, not just cleaning.
- Condensation from air leakage. Warm, humid indoor air escapes into the attic through gaps around light fixtures or the attic hatch, hits cold roof sheathing, and turns to water. Condensation-driven mold tends to spread across a wide area rather than pooling in one spot.
- Blocked soffit or intake vents. When insulation smothers the soffit vents, air can’t circulate, and moisture just sits there. InspectApedia’s ventilation guidance treats this as one of the most common and most fixable causes.
- Bathroom or kitchen fans venting into the attic instead of outside. This is shockingly common in older homes and dumps steamy air directly where mold thrives.
- Wet or compressed insulation. Once insulation gets soaked, it loses its R-value and stays damp long after the original leak stops.
Pro Tip: Before you call anyone, check your bathroom fan duct. If it terminates inside the attic instead of through the roof or a wall cap, you’ve likely found a root cause worth fixing on its own.
What Attic Mold Looks Like and How to Check Safely
Not every dark patch is mold. Old water stains look flat and brownish; active mold usually looks fuzzy, textured, or has a greenish, black, or white cast, and it comes with a musty smell you’ll notice before you see anything.
Before you climb up, run through this:
- Confirm the ladder is stable and check the attic for sagging decking or soft spots that suggest rot.
- Wear an N95 or better respirator, safety glasses, and gloves. The CDC flags attic work as a fall and exposure risk, and that’s not an exaggeration.
- Step only on joists, never on the insulation between them, since drywall below won’t hold your weight.
- Photograph the affected area from a few angles and measure roughly how large the patch is.
- Gently probe any suspect wood with a screwdriver. If it’s soft or crumbly, that’s rot, not just surface mold.
Frost on nail heads in winter, or condensation beads on the underside of the roof deck, point to a ventilation problem rather than a leak. If you see structural sagging, wet insulation you can wring out, or an odor so strong it’s noticeable from the hallway below, stop and call a professional.
Pro Tip: Take a photo standing in the attic hatch before you even step inside. It gives you a reference shot of the full space in case the mold turns out to be more widespread than the one patch you climbed up to check.
Should You Handle It Yourself or Hire a Pro?
The EPA’s roughly 10 square foot guideline is the clearest rule of thumb available, and it’s worth taking seriously. Attics rarely stay inside that limit once you account for insulation, ductwork, and porous wood framing.
Run through this checklist before deciding:
- Is the affected area under 10 square feet and limited to a hard, nonporous surface?
- Is the insulation dry and unaffected?
- Is the wood structurally sound with no soft spots or sagging?
- Does no one in the household have asthma, allergies, or a compromised immune system?
- Can you access the area safely without risking a fall?
If you answered “no” to any of those, hire a professional. DIY attic mold work carries real risk beyond the mold itself:
- Ladder falls are a common cause of home injuries, and attic access involves climbing into cramped, poorly lit spaces.
- Without proper containment, cleaning can spread spores into your living space through the attic hatch.
- Incomplete removal often means recontamination within weeks.
- Attempting DIY work on a claim you later file can complicate your insurance case if the insurer feels the damage was mishandled.
Inside a Professional Attic Mold Remediation Project
A legitimate remediation contractor doesn’t just spray a patch and leave. The process generally follows a sequence borrowed from industry-standard frameworks like ANSI/IICRC S520.
- Inspection and moisture mapping. Technicians use moisture meters and often thermal imaging to trace how far water has traveled, since it wicks laterally along framing far beyond the visible stain.
- Source repair coordination. The crew identifies and fixes, or coordinates a roofer to fix, whatever let water in to begin with.
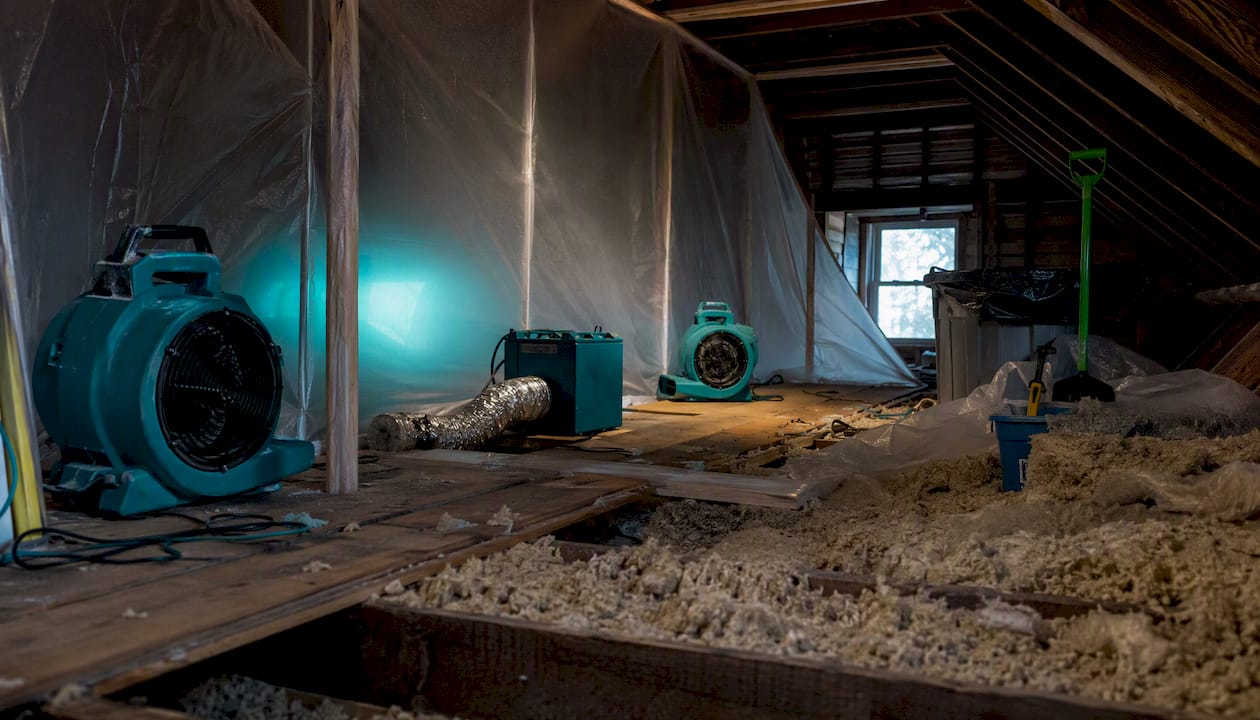
- Containment and negative air pressure. Plastic sheeting and negative air machines keep spores from migrating into the rest of the house.
- Removal of porous, contaminated materials. Wet insulation and moldy drywall or sheathing usually get replaced rather than cleaned.
- HEPA vacuuming and antimicrobial treatment of remaining structural wood.
- Controlled drying to a target moisture percentage, verified with meters, not guesswork.
- Post-remediation cleaning of dust and debris throughout the workspace.
- Third-party clearance testing to confirm the job actually worked.
A proposal worth signing should itemize containment setup, insulation removal and replacement, sheathing treatment or replacement, HEPA equipment time, disposal fees, and clearance testing as separate line items, not one vague lump sum.
For a small, localized job, expect roughly three to seven days from inspection to clearance. Systemic attic remediation involving insulation replacement and sheathing repair can stretch to two or three weeks, especially if roof repairs need to happen first and dry before remediation starts.
What Attic Mold Remediation Costs and Why
DIY materials for a genuinely small job stay in the $50 to $300 range: a stiff brush, a mold-rated cleaner, and disposable protective gear. Once you cross into professional territory, typical remediation costs run $1,500 to $6,000, and jobs requiring full sheathing replacement or extensive insulation removal can exceed $10,000.
Several factors push the number up or down:
- Accessibility. A walk-up attic with standing room costs less to work in than a cramped crawl space accessible only through a small hatch.
- Insulation removal and replacement. Wet blown cellulose almost always needs full removal, which adds labor and disposal costs fast.
- Structural repairs. Rotted rafters or sheathing mean carpentry work on top of the mold remediation itself.
- Square footage of contamination, which drives per-square-foot pricing more than almost anything else.
On insurance: homeowners policies typically don’t cover mold cleanup unless it resulted from a sudden, covered event like a burst pipe, rather than a long-term leak the homeowner should have caught. Document everything: the date you discovered the problem, photos of the source and the damage, and any contractor scope of work. A restoration company that documents in real time, with photos and moisture readings tied to a timestamp, gives your insurer far less room to dispute the claim.
Why Third-Party Clearance Testing Matters
Moisture meters and thermal imaging tell a contractor where the problem lives. Clearance testing, whether surface swabs or air sampling, tells you whether the fix actually worked.
The distinction that trips up homeowners: a remediation company testing its own work has an obvious incentive to pass itself. An independent industrial hygienist or certified lab has none. That’s why third-party verification carries more weight, especially if the job affected living spaces or anyone in the household reported symptoms.
A proper clearance report should state the sampling method used, compare indoor spore counts to outdoor baseline levels, and give a plain pass or fail determination you can hand to an insurer or a future buyer’s inspector.
Pro Tip: Ask upfront whether clearance testing is included in the remediation quote or billed separately by a third party. If it’s the remediator testing their own work, ask why, and consider paying the modest extra fee for an independent hygienist instead.
Stopping Attic Mold From Coming Back
Cleaning mold without fixing what caused it is a temporary win. Regrowth risk starts within 24 to 48 hours once moisture returns, so prevention has to target the mechanism, not just the stain.
The highest-return fixes:
- Clear soffit intake vents of insulation blockage and confirm ridge or roof exhaust vents are actually open and unobstructed.
- Install baffles at the eaves to keep insulation from creeping over the soffit vents again.
- Reroute any bathroom or kitchen exhaust fan so it vents outside through the roof or a wall cap, never into the attic itself.
- Seal attic bypasses around light fixtures, the attic hatch, and plumbing stacks where warm indoor air sneaks upward.
If insulation got wet during the original event, wet blown cellulose almost always needs full replacement since it compresses and loses insulating value once soaked. Fiberglass batts that got briefly damp but dried without visible mold sometimes survive, but a professional assessment is the safer call before reinstalling anything questionable.
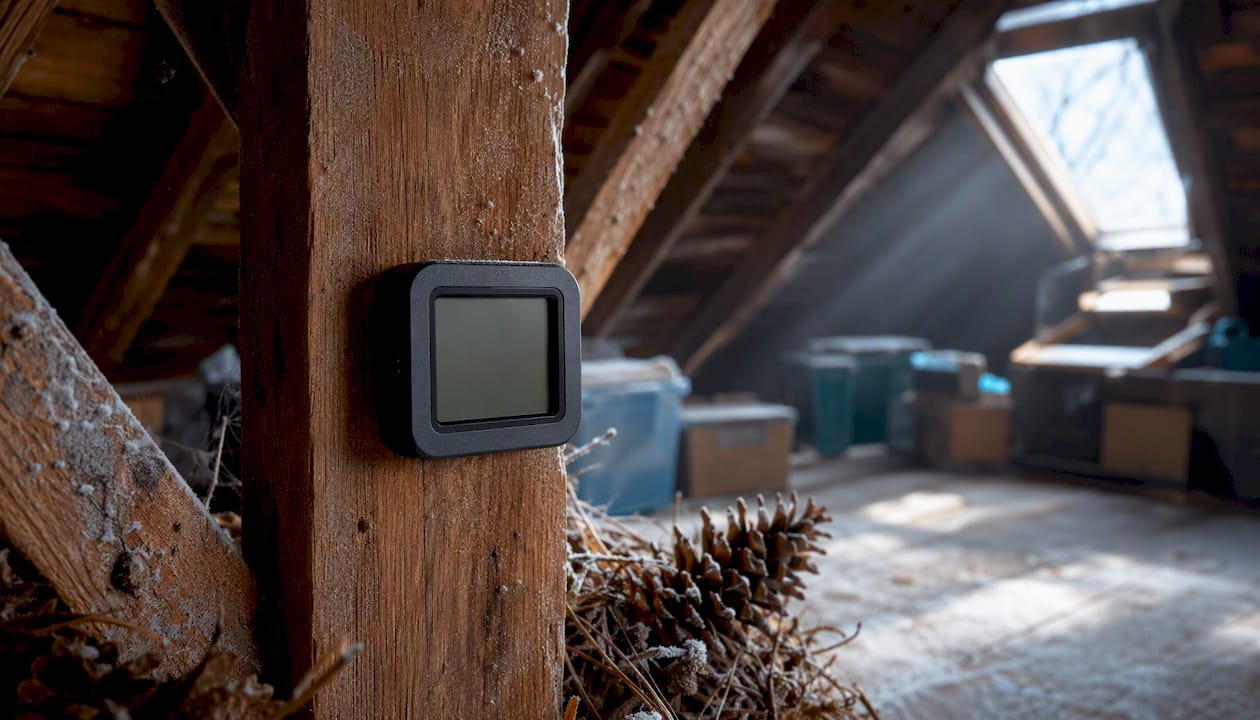
Seasonally, check the attic each fall before heating season starts and each spring after it ends. Look for frost on nails in winter and any musty smell in summer. An inexpensive attic humidity monitor, kept below roughly 50 to 55 percent relative humidity, catches problems long before you’d see visible growth.
What the Safety Data Says About DIY Attic Work
Attic work carries risks that go beyond the mold itself. The CDC specifically flags fall hazards and spore exposure as reasons to approach attic cleanup with real caution, not casual confidence.
A few things worth keeping in your back pocket:
- Skip DIY entirely if anyone in the home has asthma, allergies, or a compromised immune system.
- Use a licensed mold assessor for anything beyond a small, contained patch.
- Keep every photo, moisture reading, and contractor scope of work in one folder. You’ll want it if you ever file an insurance claim or sell the house.
Why Fixing the Leak Matters More Than Cleaning the Mold
Homeowners call about the mold. What actually needs solving is almost always the water. Cleaning a stain without stopping the source is like mopping a floor under a dripping faucet. It looks fine for a week.
That’s the priority order Infinityrestoration builds every job around: locate the moisture path first, using moisture mapping to find water traveling under the visible spot, then scope the remediation around that data instead of guessing. Having a Florida Licensed Mold Assessor on staff means the inspection carries actual regulatory weight, and the real-time documentation matters just as much when a homeowner is fighting an insurance company for coverage.
Treat attic mold as a building envelope problem. The stain is just where it decided to show up.
When to Call Infinity Restoration for Attic Mold
If your attic mold covers more than a small patch, involves wet insulation, shows signs of structural softening, or you’re simply not comfortable climbing up there with a respirator on, it’s time to call in a professional rather than experiment.

Infinityrestoration brings a Florida Licensed Mold Assessor and advanced moisture mapping to every attic inspection, so the scope of work is based on data rather than a guess from ground level. That matters most when you’re also filing an insurance claim: our documentation process captures photos, moisture readings, and timestamps as the work happens, which gives adjusters less room to push back. We handle containment, porous material removal, insulation replacement, and reconstruction under one roof, and we’re available 24/7 for emergency response when a roof leak turns into an urgent situation. If you’ve spotted staining, smelled something musty, or just want a professional opinion before you climb that ladder yourself, request an inspection and get a clear, itemized estimate before any work begins.
Frequently Asked Questions
Can attic mold make me sick if I never go up there?
Spores can migrate through attic hatches, recessed lighting gaps, and shared HVAC returns even if you never climb up yourself, especially with condensation-driven mold that spreads across a wide area.
Does attic mold always mean I need a new roof?
Not necessarily. A single failed flashing or a cracked pipe boot might need only a targeted repair, while widespread condensation staining usually points to a ventilation and air-sealing fix rather than roof replacement.
How long does attic mold remediation take?
A small localized job typically wraps up in three to seven days. Systemic remediation involving insulation replacement and sheathing repair can take two to three weeks, particularly if roof repairs need to happen and dry first.
Will my homeowners insurance pay for attic mold remediation?
Usually not, unless the mold resulted from a sudden covered event like a burst pipe rather than a long-term leak. Check your specific policy and document the timeline carefully either way.
What questions should I ask a contractor before hiring them?
Ask whether clearance testing is included or billed separately through an independent hygienist, whether the proposal itemizes containment and disposal separately from cleanup labor, and whether they carry a licensed mold assessor on staff.
This article is general information, not a substitute for advice from a qualified doctor. Consult a qualified healthcare professional about your own circumstances before acting on anything here.
Sources
- Mold cleanup in your home | US EPA
- Attic Moisture and Mold: Detect & Correct – InspectApedia
- Attic Mold From Condensation: Causes, Signs, and Next Steps | My Mold Expert
- Does homeowners insurance cover mold? – Progressive
Recommended
- Mold Removal Altamonte Springs | Fast & Reliable Service
- Mold Removal Maitland | Fast & Reliable Service
- Mold Removal Apopka | Fast & Reliable Service
- Mold Remediation Orlando FL | Licensed Mold Removal | Infinity Restoration
Made with BabyLoveGrowth to reach more people through search