
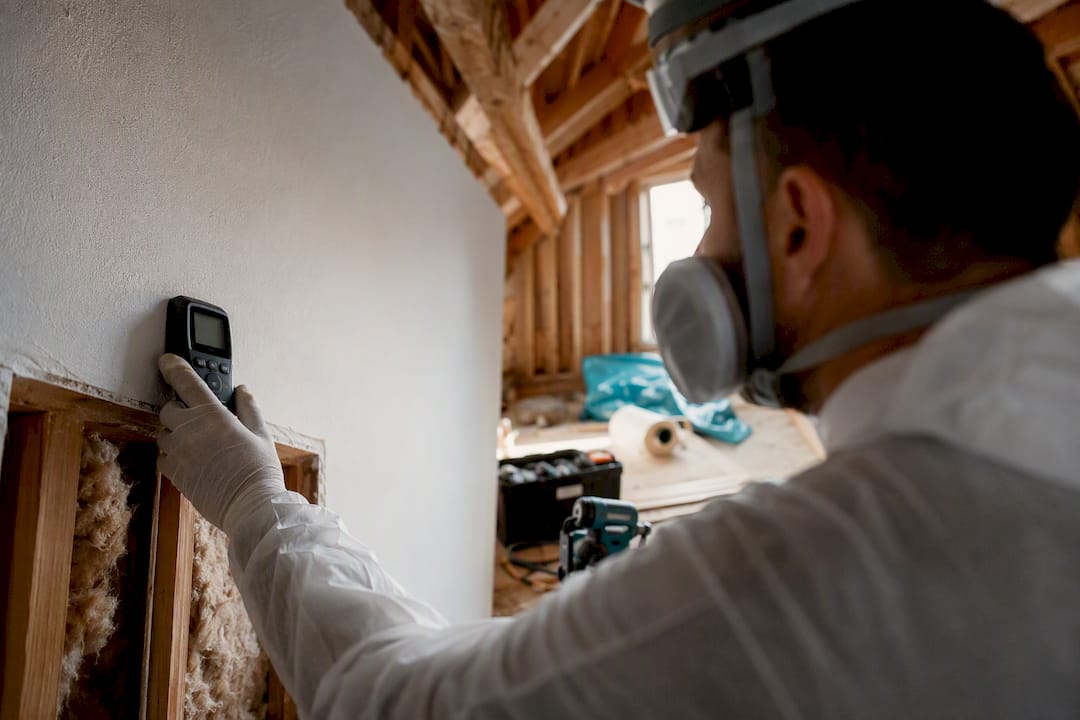
A mold clearance test, also called post-remediation verification (PRV), confirms a remediated area is visibly clean, dry, and comparable to outdoor fungal ecology. It combines three things: visual inspection, moisture readings, and targeted air or surface sampling. You should require it before signing off on any mold job, and before the contractor’s containment comes down.
Here’s what makes a clearance test valid:
- Visual inspection — no visible residue, staining, or odor in the work area
- Moisture verification — wood and drywall readings at or below dry-standard thresholds
- Targeted sampling — air or surface samples compared against an outdoor baseline
Industry guidance under the IICRC S520 standard recommends an independent third party run this test, not the company that did the remediation work.
Key Takeaways
Mold clearance testing works because it replaces guesswork with three verifiable data points: a clean visual inspection, moisture readings at dry-standard thresholds, and sampling that matches indoor air to an outdoor baseline.
| Point | Details |
|---|---|
| Three-part verification | A valid clearance test always combines visual inspection, moisture readings, and air or surface sampling. |
| Independence matters | IICRC S520 guidance recommends hiring a third-party assessor instead of letting the remediator test their own work. |
| Timing is non-negotiable | Sample while containment and negative air are still running, roughly 24 hours after final cleaning. |
| Budget for retests | Expect $300 to $1,200 for testing, plus a contract clause defining who pays if a retest is needed. |
| Infinity Restoration’s role | Infinityrestoration pairs a licensed mold assessor and moisture mapping with documented, insurer-ready reporting. |
Where to Verify These Standards Yourself
- EPA mold testing guidance explains why no federal spore thresholds exist and when sampling actually helps.
- CDC/NIOSH environmental testing guidance covers the Dampness and Mold Assessment Tool and sampling limitations.
- IAC2 Mold Inspection Standards of Practice details minimum sample counts and moisture-check protocols.
Table of Contents
- What a Mold Clearance Test Actually Checks
- Why Clearance Testing Protects You Financially and Legally
- Step-by-Step: What Happens on Test Day
- Getting Ready: A Homeowner’s Pre-Test Checklist
- Reading the Results: Pass, Fail, and What Comes Next
- What Clearance Testing Costs and How Long It Takes
- Choosing Who Runs Your Test: Credentials That Matter
- How Infinity Restoration Supports a Defensible Clearance Process
- Sources
What a Mold Clearance Test Actually Checks
A real clearance inspection isn’t a quick walkthrough with a flashlight. It’s a structured sequence, and each step exists to catch a different kind of failure.
- Visual inspection first. The assessor looks for residual staining, dust, or debris using what’s often called a white-glove standard, meaning surfaces should look and feel clean to the touch. Containment barriers get checked for tears or gaps, and the assessor notes any lingering musty odor, which often signals hidden moisture.
- Moisture verification second. Pin-type meters penetrate the material slightly and give a direct moisture-content reading; pinless meters scan without puncturing the surface, which is useful on finished walls. Wood generally needs to read below roughly 16% moisture content, and gypsum board needs to be dry to the touch and instrument, before the space passes.
- Air sampling third. The technician sets an outdoor baseline sample, then pulls one to four indoor samples using spore-trap cassettes connected to a calibrated pump, which get sent to a lab for spore count and species identification.
- Surface sampling when warranted. Tape lifts or swabs target specific stains or suspect areas the air sample wouldn’t catch, useful for confirming whether a stain is active mold or just old discoloration.
Why Clearance Testing Protects You Financially and Legally
Skipping this step doesn’t just risk hidden mold. It risks your claim, your closing, and your leverage if something goes wrong later.
- Insurance leverage. Adjusters increasingly want documented proof of clearance before releasing final payment on a mold claim, and a clean lab report gives you that proof in writing.
- Contractual protection. A passed clearance test shifts liability. Once documented, the remediator’s responsibility for that specific job is largely satisfied, and any future issue becomes a new, separate event rather than a continuation of the old one.
- Resale and disclosure value. Buyers and their inspectors ask for mold history on almost every transaction; a dated clearance report with lab backing answers that question before it becomes a negotiating point.
- A snapshot, not a guarantee. A passed test reflects conditions on the day of sampling. It doesn’t promise the space stays mold-free if a new leak shows up next year. EPA guidance is explicit that there are no federal numeric thresholds for airborne spores, so any result has to be read in context, not as a permanent seal of approval.
Step-by-Step: What Happens on Test Day
A defensible clearance test follows a specific order of operations. Break the sequence and you can invalidate the whole comparison.
- Arrival and documentation. The assessor photographs the containment as found, still sealed, with negative-air equipment running. This step matters because sampling with containment already removed skews the comparison against the outdoor baseline.
- Visual and moisture checklist. The technician walks the plan room by room, logging moisture readings at points keyed to the original remediation scope, not just wherever looks convenient.
- Air sampling setup. Pumps get calibrated, sample duration and flow rate logged (commonly around 5 minutes at 15 liters per minute), and an outdoor control sample is pulled before any indoor cassette is opened.
- Chain of custody. Every cassette gets labeled, bagged, and tracked from the moment it’s sealed to the moment the lab opens it, which is what makes the report usable if there’s ever an insurance dispute.
Pro Tip: Ask for the pump calibration log and sample duration before you accept a report. Reports missing that detail are the ones that fall apart under scrutiny in a claim dispute.
The finished report should include containment photos, moisture logs, cassette locations, lab analysis with chain-of-custody paperwork, and a clear pass/fail conclusion from the assessor.
Getting Ready: A Homeowner’s Pre-Test Checklist
Poor timing and prep cause more failed tests than actual leftover mold does. A few rules prevent that.
- Schedule sampling roughly 24 hours after final cleaning, while containment and negative-air machines are still running.
- Do not let anyone start reconstruction or reinstall drywall, flooring, or trim before the test happens.
- Don’t run the HVAC system through the containment zone before sampling; it can redistribute spores and skew the count.
- Hire the tester independently of the remediation company. A contractor grading its own work is a conflict of interest the IICRC S520 standard specifically warns against.
- Assemble your remediation contract, prior inspection reports, and photos of the original damage for the assessor and your insurer.
Reading the Results: Pass, Fail, and What Comes Next
A pass generally means indoor spore counts come back comparable to the outdoor baseline, with no single indoor species dominating that wasn’t also present outdoors, and moisture readings sitting at or below dry-standard targets.
Failures tend to follow familiar patterns:
- Visible residue or staining the visual inspection should have caught
- Moisture readings still elevated in wall cavities or subfloor
- One fungal genus spiking indoors while absent from the outdoor sample
When a test fails, the fix is usually targeted: re-clean the flagged area, re-verify moisture, and re-sample just that zone rather than redoing the whole project. Your remediation contract should already specify who pays for that retest. If results come back inconsistent across rounds, or an occupant has a respiratory condition that raises the stakes, bring in an independent indoor environmental professional (IEP) rather than relying solely on the original remediator’s read of the data.
What Clearance Testing Costs and How Long It Takes
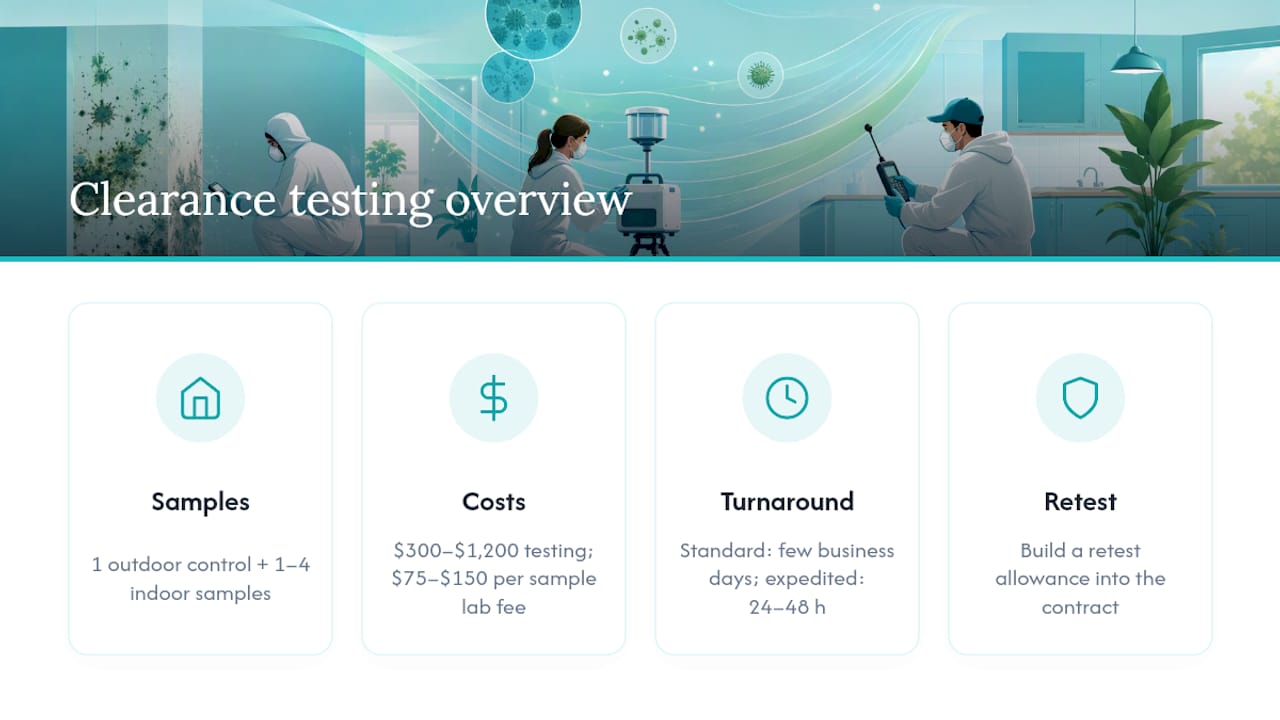
Budgeting for this step is straightforward once you know the moving parts. Typical independent clearance testing runs $300 to $1,200 for a house-sized project, with lab fees for spore-trap cassettes generally landing in the $75 to $150 range per sample.

Most homes need one outdoor control plus one to four indoor samples, more if multiple rooms or floors were affected. Standard lab turnaround runs a few business days; expedited processing (often 24 to 48 hours) costs more but keeps a renovation schedule from stalling. Build a retest allowance into your contract up front. It’s cheaper than negotiating it after a failed result.
Choosing Who Runs Your Test: Credentials That Matter
The person holding the pump matters as much as the pump itself. IICRC S520 recommends an independent IEP precisely because a remediator grading their own containment has an incentive to call it clean.
- Look for ACAC CMI or CIE certification (Council-certified Microbial Investigator or Indoor Environmental Consultant) and active IAQA membership.
- Confirm the lab is AIHA-LAP or EMLAP accredited, since accreditation is what makes a spore count defensible later.
- Check for a state mold assessor license where your state requires one.
- Red flags: no chain-of-custody paperwork, no moisture log, or a report that reads like a sales pitch instead of data.
How Infinity Restoration Supports a Defensible Clearance Process
Getting remediation and verification right depends on documentation discipline as much as cleaning technique. Infinityrestoration built its process around that reality.
- A Florida Licensed Mold Assessor on staff means clearance-related questions get answered by someone credentialed to answer them, not just the cleanup crew.
- Advanced moisture mapping identifies hidden wet zones before they turn into a failed clearance test weeks later.
- Every project gets documented with photos, moisture logs, and chain-of-custody records, the same paper trail insurers ask for during claims.
- Infinityrestoration coordinates both mold remediation and testing support, while encouraging an independent assessor when a homeowner wants that extra layer of separation.
What I’d Insist On Before Signing a Remediation Contract
Put clearance testing in writing before work starts, including who pays for a retest if the first one fails. Require containment to stay intact until the test happens, and don’t release final payment until you have copies of the moisture logs and lab report in hand. If an occupant has health concerns or results seem inconsistent, get an independent IEP involved rather than taking one company’s word for it.
— Nate
Get a Defensible Clearance Test Backed by a Licensed Assessor
Most remediation companies hand you a broom and a handshake. Infinityrestoration hands you a Florida Licensed Mold Assessor, moisture-mapping data, and a documentation trail built for insurance adjusters, not just for show.

If you’re in the Orlando area and dealing with a mold problem right now, or you’re partway through remediation and need someone to verify the work before containment comes down, Infinityrestoration’s mold testing services in Orlando cover both the assessment and the paper trail your insurer will ask for. The team’s 24/7 emergency response means a suspected leak or new growth doesn’t sit for days while you find someone available. Reach out for a mold testing appointment, and get the moisture logs, photos, and lab documentation that make your claim, or your closing, go smoothly.
Sources
- Mold testing or sampling | US EPA
- Environmental testing | CDC/NIOSH
- IAC2 Mold Inspection Standards of Practice
- Mold clearance testing: a post-remediation homeowner guide | InspectandTest