
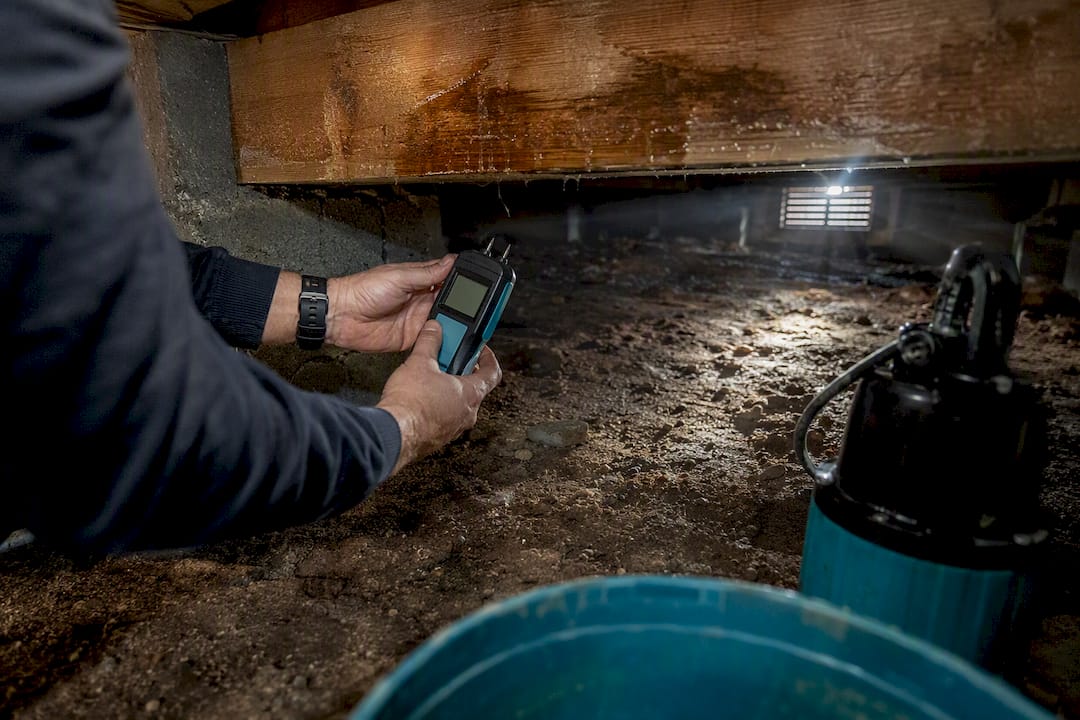
Yes, water in a crawl space is a serious problem, and how fast you respond determines whether you’re dealing with a $500 fix or a $20,000 rebuild. Your first priorities are safety, source control, and documentation, in that order. Standing water needs to come out and drying needs to start before mold gets a foothold, which happens faster than most homeowners realize.
Here’s the sequence that actually protects your house and your insurance claim:
- Check for exposed wiring or a tripped breaker before you step into any standing water
- Photograph everything, including water lines, damaged materials, and the suspected source, before you touch anything
- Identify and stop the source if it’s obvious and safe to reach, like a burst supply line
- Pump or vacuum out standing water as soon as it’s safe to do so
- Set up fans and a dehumidifier to start active drying immediately
- Call a licensed restoration contractor if you see contamination, structural sagging, or water you can’t identify
Pro Tip: Mold can begin colonizing wet wood and insulation within 24 to 48 hours of exposure, so the clock starts the moment water hits the crawl space floor, not when you notice it.
Key Takeaways
Crawl space water damage escalates fast because mold growth begins within 24 to 48 hours, and fixing it permanently requires stopping bulk water before installing drainage, encapsulation, or humidity control.
| Point | Details |
|---|---|
| Act within the mold window | Start extraction and drying within 24 to 48 hours of finding water to limit mold growth. |
| Diagnose before you fix | Use the plastic-sheet test and weather correlation to tell groundwater, condensation, and plumbing leaks apart. |
| Fix in the right order | Address grading, gutters, and drainage before installing a vapor barrier or encapsulation. |
| Budget realistically | Costs vary widely depending on the severity of damage and repair requirements. |
| Call a pro for red flags | Infinity Restoration offers moisture mapping, a licensed mold assessor, and 24/7 response for structural, contamination, or hidden leak cases. |
Table of Contents
- What Are the Signs of Water Damage in a Crawl Space?
- How Do You Find the Source of Crawl Space Moisture?
- What Should You Do in the First 72 Hours After Finding Water?
- What’s the Right Order for Fixing Crawl Space Water for Good?
- How Much Does Crawl Space Water Damage Repair Cost?
- When Should You Call a Restoration Professional?
- What the Data Actually Tells You to Do First
- Get Your Crawl Space Assessed Before Small Water Damage Becomes a Big Repair Bill
- Sources
What Are the Signs of Water Damage in a Crawl Space?
Most homeowners don’t discover crawl space water by looking under the house. They notice it upstairs first, which is exactly the problem.
Musty odors drifting into living rooms, floors that feel spongy near exterior walls, unexplained allergy flare ups, and a home that never seems to hold a comfortable humidity level are all classic tells. Rusted HVAC ductwork, peeling paint near baseboards, and visible mold on floor joists confirm what your nose already suspected.
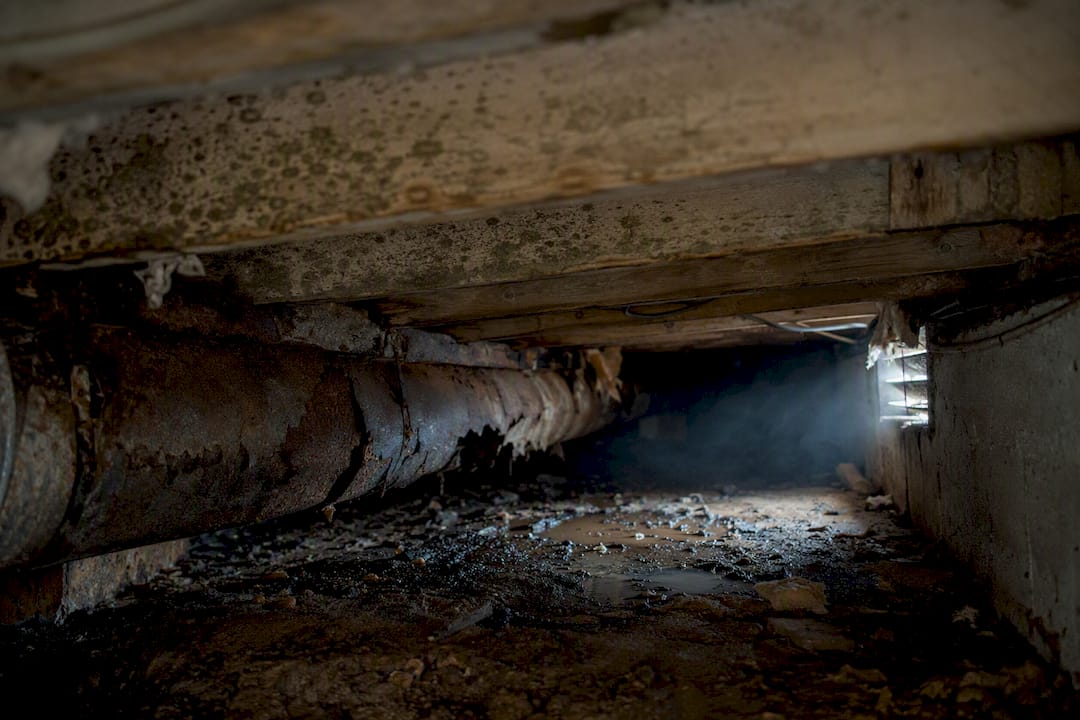
The mechanism behind the upstairs symptoms is called the stack effect. Warm air rises through your house and pulls air up from the crawl space to replace it, effectively turning your crawl space into the lungs of your home. If that air is loaded with moisture, mold spores, or musty gases, your living space breathes it in daily.
The consequences compound over time:
- Wood rot sets in as sustained moisture breaks down structural framing, sill plates, and floor joists
- Indoor air quality drops, aggravating asthma and allergies for anyone living above the crawl space
- Pests move in, since termites and carpenter ants both thrive in consistently damp wood
- Energy bills climb because wet insulation loses much of its R-value and your HVAC works harder to compensate
None of these show up overnight, but by the time floors visibly sag, you’re usually looking at years of unaddressed crawl space moisture issues, not weeks.
How Do You Find the Source of Crawl Space Moisture?
Fixing crawl space water damage without knowing the source is how homeowners waste money. Sealing a crawl space that has an active plumbing leak, or encapsulating one that’s still flooding from bad grading, traps the problem instead of solving it.
Work through the inspection in this order:
- Check every plumbing line, water heater, and appliance connection above or near the crawl space first, since leaks here are the easiest fix
- Follow HVAC condensate lines to their termination point; a disconnected or clogged line can dump gallons of water daily
- Walk the exterior perimeter and check gutters, downspouts, and grading; soil that slopes toward the foundation is a common, fixable culprit
- Look for tide lines or seepage patterns on foundation walls, which point to groundwater or surface runoff
- Note whether moisture is a puddle after rain or a constant dampness with no clear wet season
A simple, low-cost diagnostic homeowners can run themselves is the plastic-sheet test: tape a square of clear plastic to the crawl space floor and check it after a day or two. Moisture collecting on top of the plastic points to condensation from humid air; moisture underneath, between the plastic and the soil, points to vapor rising from the ground itself.
| Symptom Pattern | Likely Source |
|---|---|
| Wet only after heavy rain, wall stains present | Groundwater or surface runoff |
| Damp year round, no puddles, consistent moisture | Soil vapor intrusion |
| Moisture worse in summer, tied to humidity swings | Condensation from vented air |
| Localized wet spot near a fixture or line | Plumbing or HVAC condensate leak |
Diagnosis this specific matters because the fix for groundwater (exterior drainage) is completely different from the fix for condensation (sealing and dehumidification). Get it backward and you’ll spend money twice.
What Should You Do in the First 72 Hours After Finding Water?
Move fast, but move safely. Water and electricity in a confined space is a genuine hazard, not a theoretical one.
- Check for electrical risk first. If outlets, wiring, or an HVAC unit sit in or near standing water, shut off the relevant breaker before entering, and skip entry entirely if you’re not confident it’s safe.
- Put on basic PPE. Rubber boots, gloves, and an N95 mask protect you from contaminated water and airborne mold spores while you assess the space.
- Document before you disturb anything. Timestamped photos of water levels, affected materials, and the visible source protect your insurance claim. If the event was sudden, like a burst pipe, call your insurer within days. Gradual seepage from grading or groundwater is often treated differently by policies, so document the timeline carefully either way.
- Extract standing water. A wet/dry vacuum handles small volumes; a submersible pump is faster for anything deeper than an inch or two.
- Start mechanical drying immediately. Position fans to move air across wet surfaces and run a dehumidifier sized for the space. Pull out saturated insulation and any contaminated debris.
- Track your progress. Keep a simple log of moisture readings or visual drying progress each day. If humidity or wood moisture content isn’t trending down within 72 hours, something is still feeding the problem.
Pro Tip: Don’t throw away wet materials before photographing them. Insurance adjusters and mold assessors both rely on that “before” documentation, and once it’s in the dumpster, you’ve lost your best evidence.
If you smell sewage, see contamination, or the crawl space is too tight to safely maneuver in, stop and call a professional. Some jobs simply aren’t DIY territory, and what to do after water damage gets a lot easier when you’re not guessing.
What’s the Right Order for Fixing Crawl Space Water for Good?
Homeowners often jump straight to encapsulation because it’s the visible, satisfying fix. That’s backward. Sealing a crawl space before addressing drainage traps water inside a plastic liner, and now you’ve built a bathtub under your house.
The correct sequence, confirmed by building science guidance on crawlspace water management, goes like this:
- Stop bulk water first. Re-grade soil to slope away from the foundation, extend downspouts, and clean gutters so roof runoff isn’t dumping next to your footing.
- Install drainage where grading isn’t enough. Interior perimeter drains or exterior French drains route groundwater to a sump pit instead of letting it pool under the house.
- Size and install the sump system correctly. A perforated pit set below the footing, a check valve to stop backflow, and a battery backup for storms or power outages are non-negotiable in flood-prone or high water table areas.
- Add the vapor barrier once the space is dry. A continuous liner, sealed at seams and up the walls to the piers, blocks soil vapor, which can otherwise release 10 to 30 gallons of water vapor per day into the air.
- Bring in a dehumidifier sized for the cubic footage of the space, with a controller that maintains relative humidity below 60%.
| Fix | Solves | Skip It and Risk |
|---|---|---|
| Grading and gutters | Surface runoff pooling at foundation | Constant re-flooding after every rain |
| Sump pump with check valve | Groundwater and high water table | Backflow, pump failure during storms |
| Vapor barrier/encapsulation | Soil vapor and humid air infiltration | Wood rot, mold, elevated indoor humidity |
| Dehumidifier | Residual moisture after sealing | Encapsulated space traps humidity instead of blocking it |
Done in this order, encapsulation and mechanical dehumidification can meaningfully reduce crawl space moisture and cut energy loss. Done out of order, you’ve just installed an expensive moisture trap.
How Much Does Crawl Space Water Damage Repair Cost?
Costs swing widely because “crawl space water damage” covers everything from a damp afternoon after one heavy rain to months of unnoticed groundwater intrusion rotting out floor joists.
These 2026 ranges reflect size and severity; severe cases involving structural repair or heavy mold can run well past $20,000. Low clearance crawl spaces cost more to work in, contaminated water requires additional protective measures, and any job needing exterior excavation or an engineer’s sign off adds both time and expense.
On timeline, aim for measurable drying progress within 72 hours of extraction. Remember the mold clock starts within 24 to 48 hours of the initial exposure, so every day of delay before drying begins adds risk and, often, cost. A straightforward extraction and drying job often wraps in under a week; encapsulation projects with drainage work typically run one to three weeks depending on access and scope.
When Should You Call a Restoration Professional?
Some crawl space problems are genuinely manageable with a wet/dry vac and a weekend. Others aren’t, and knowing the difference protects both your house and your safety.
Call a professional when you encounter:
- Standing water that’s been sitting for more than a day or two
- Sewage backup or any water with a chemical smell
- Visible mold covering more than a small, contained patch
- Sagging joists, soft subfloor, or other structural red flags
- A plumbing leak you can’t locate or access safely
- A crawl space too tight or hazardous for you to work in comfortably
A qualified contractor should do more than pump water and leave. Expect a full source diagnosis, moisture mapping to track drying progress with actual data rather than guesswork, controlled extraction, a documented drying plan, mold assessment where warranted, and paperwork your insurer can actually use.
Infinity Restoration builds its process around exactly that standard: advanced moisture mapping to track drying in real time, a Florida Licensed Mold Assessor on staff for accurate mold evaluation, and 24/7 emergency response so a Saturday night pipe burst doesn’t turn into a Monday morning mold problem. That combination of technical documentation and rapid response is what separates a contractor you can hand to your insurance adjuster from one you’re still chasing for paperwork three weeks later.
For anything involving structural risk or contamination, a licensed restoration team should be your first call, not your last resort.
What the Data Actually Tells You to Do First
Most crawl space advice online jumps straight to encapsulation because it photographs well and sells easily. The research doesn’t support that order. Drainage and source control come first every time, and any contractor who wants to seal your crawl space before fixing the grading or installing a sump pit is skipping a step that protects their invoice, not your house.
The other place conventional advice falls short is documentation. Homeowners treat photos and moisture logs as an afterthought, something you do “if you remember.” Insurers treat the absence of that documentation as a reason to deny or reduce a claim. The moisture mapping approach Infinity Restoration uses isn’t a nice add on; it’s the difference between a claim that gets paid promptly and one that drags into a dispute over when and how the damage happened.
If I had to boil this down to one instruction: fix the water source before you fix the symptom, and document every step like your insurance adjuster is going to ask about it, because eventually they will.
— Nate
Get Your Crawl Space Assessed Before Small Water Damage Becomes a Big Repair Bill
Infinity Restoration gives Orlando homeowners something most crawl space contractors skip: real-time moisture mapping data and a Florida Licensed Mold Assessor on the same team handling your extraction and drying. That means no guessing about whether your crawl space is actually dry, and no separate mold inspector visit weeks later when your contractor already suspects a problem.

If you found water under your house today, the smartest move is a same-day assessment, not a wait-and-see approach that lets the 24 to 48 hour mold window close on you. Infinity Restoration’s 24/7 emergency water damage response gets a technician on site fast, documents everything for your insurance claim from the first visit, and gives you a clear, written plan for extraction, drying, and any follow-up encapsulation work your space actually needs. If mold is already visible, their mold testing service confirms the scope before remediation starts. Call for an inspection before that damp spot turns into a structural repair.
Sources
- Water management for existing crawlspace floor (BASC/PNNL resource)
- Guide to closing and conditioning ventilated crawlspaces (ENERGY STAR)
- Mold and health (EPA)
- Water in a crawl space: what to do (This Old House)
- Water Damage in a Crawl Space: Costs & What to Do (2026)