
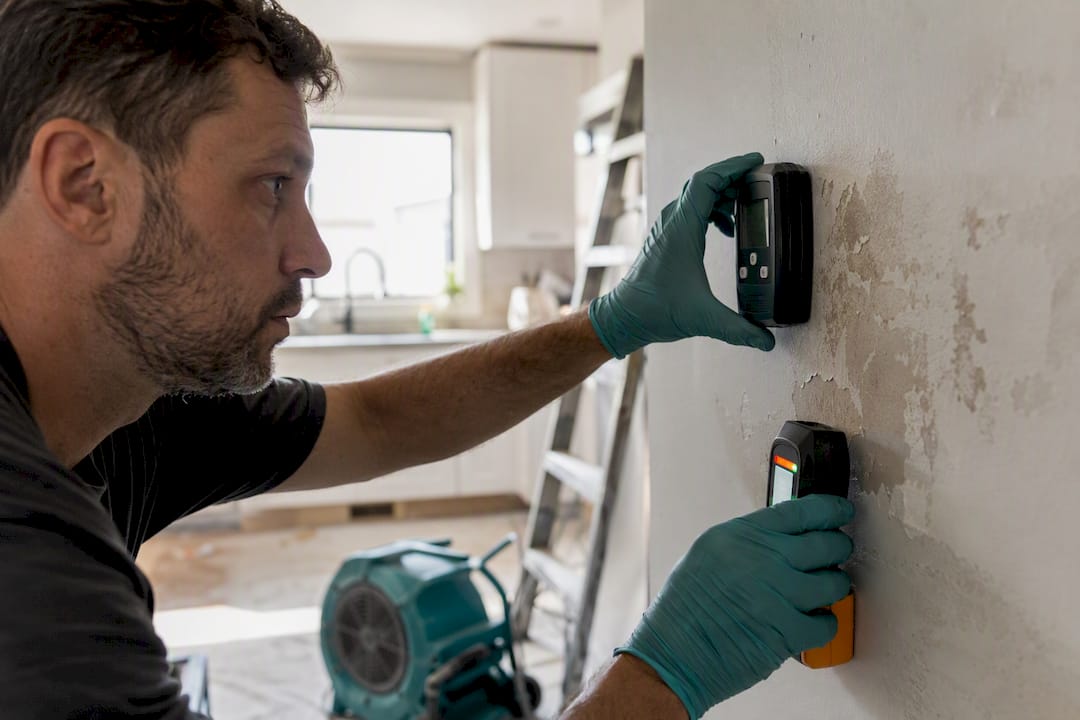
Moisture mapping locates, measures, and documents hidden water in walls, floors, and ceilings so technicians can guide drying equipment to the exact spots that need it and give insurance adjusters proof the job was done right. It combines meter readings, thermal scans, and floor-plan overlays into one time-stamped record.
Three things happen when a property gets mapped correctly:
- Hidden moisture pockets behind drywall or under flooring get located before they turn into mold
- Drying equipment gets placed where it’s actually needed instead of guessed at
- A dated, photo-backed record exists to support your insurance claim
The IICRC S500 standard sets the industry benchmark for how moisture should be monitored and documented during a water loss, and time-stamped logs paired with thermal photos are what separate a defensible claim from a disputed one. Infinity Restoration builds every water damage job around this kind of mapping, not as an add-on service but as the backbone of how drying decisions get made.
Key Takeaways
Moisture mapping works because it turns scattered instrument readings into a dated, location-specific record that directs drying equipment and proves claim scope to insurers.
| Point | Details |
|---|---|
| Combine tools, don’t rely on one | Pinless meters scan fast, pin meters confirm exact readings, and thermal cameras only flag suspects that meters must verify. |
| Monitor on a fixed schedule | Retest the same grid points every 24 to 48 hours and update the map so trends, not single readings, guide decisions. |
| Match dry standards to materials | Framing, drywall, hardwood, and concrete each dry at different rates and need separate target thresholds. |
| Request your documentation | Ask for dated logs, thermal images, and map overlays before your restoration job closes to strengthen your claim packet. |
| Choose mapping-first restoration | Infinity Restoration builds grid testing, thermal confirmation, and real-time documentation into every water damage job from the first visit. |
Table of Contents
- What Is Moisture Mapping in Water Damage Restoration?
- Why Skipping Moisture Mapping Costs You More
- What Tools Do Professionals Use to Measure Moisture?
- How Does a Moisture Mapping Inspection Actually Work?
- How to Read Moisture Readings and Know What’s Actually Dry
- What Documentation Do Insurance Adjusters Expect?
- How Infinity Restoration Handles Moisture Mapping on Every Job
- Staying Safe: Contamination and Hazard Protocols During Mapping
- Common Problems That Trip Up Moisture Mapping
- The Real Value Nobody Talks About Enough
- Get Professional Moisture Mapping From Infinity Restoration
- Sources
What Is Moisture Mapping in Water Damage Restoration?
Moisture mapping is the systematic process of testing a structure at multiple points, recording each reading’s exact location and value, and plotting those readings onto a floor plan or photo overlay. It’s different from a quick meter check, which tells you one number at one spot, and different from a mold inspection, which looks for biological growth rather than measuring material moisture content. A map tells you where the water traveled, how deep it went, and whether it’s getting drier over time.
Most mapping jobs get triggered by one of these events:
- A burst pipe or supply line failure behind a wall
- A slow appliance leak (dishwasher, washing machine, water heater) that’s gone unnoticed for weeks
- Flooding from storms or a roof failure
- An insurance claim that requires documented proof of loss and drying progress
An initial map on a typical residential room takes a technician somewhere between 30 minutes and two hours, depending on square footage and how many materials need testing. Commercial spaces with multiple rooms or unusual construction take longer. That first map becomes the baseline every later reading gets compared against.
Why Skipping Moisture Mapping Costs You More
Water that looks dry on the surface can still be soaking into framing, subfloor, or insulation, and that’s exactly the kind of moisture mapping is built to catch. A carpet can feel dry to the touch within hours while the pad underneath stays saturated for days, feeding mold growth you won’t see until it’s already spread through a wall cavity.
Here’s what mapping actually changes about a restoration job:
- It finds wet pockets a visual inspection misses. Water migrates along framing and under flooring far from the original leak, and a map catches those secondary zones before they become secondary problems.
- It cuts the cost of drying. Instead of running air movers and dehumidifiers across an entire room “just in case,” technicians place equipment only where readings say it’s needed, which shortens equipment rental days.
- It gives adjusters something concrete to approve. A map with grid-referenced readings and dates is far harder to dispute than a contractor’s word that a space “needed three more days” of drying.
The IICRC recommends monitoring drying progress at least every 24 hours during active mitigation. Skip that cadence, and you either under-dry a structure and set up a mold problem, or you over-dry it and pay for equipment days nobody needed.
What Tools Do Professionals Use to Measure Moisture?
No single instrument tells the whole story, which is why a real mapping job uses several tools working together rather than one device doing everything.
Pinless moisture meters scan a surface non-invasively using electromagnetic signals, letting a technician cover a wall or floor quickly without leaving marks. They’re the first pass tool, good for screening large areas fast.
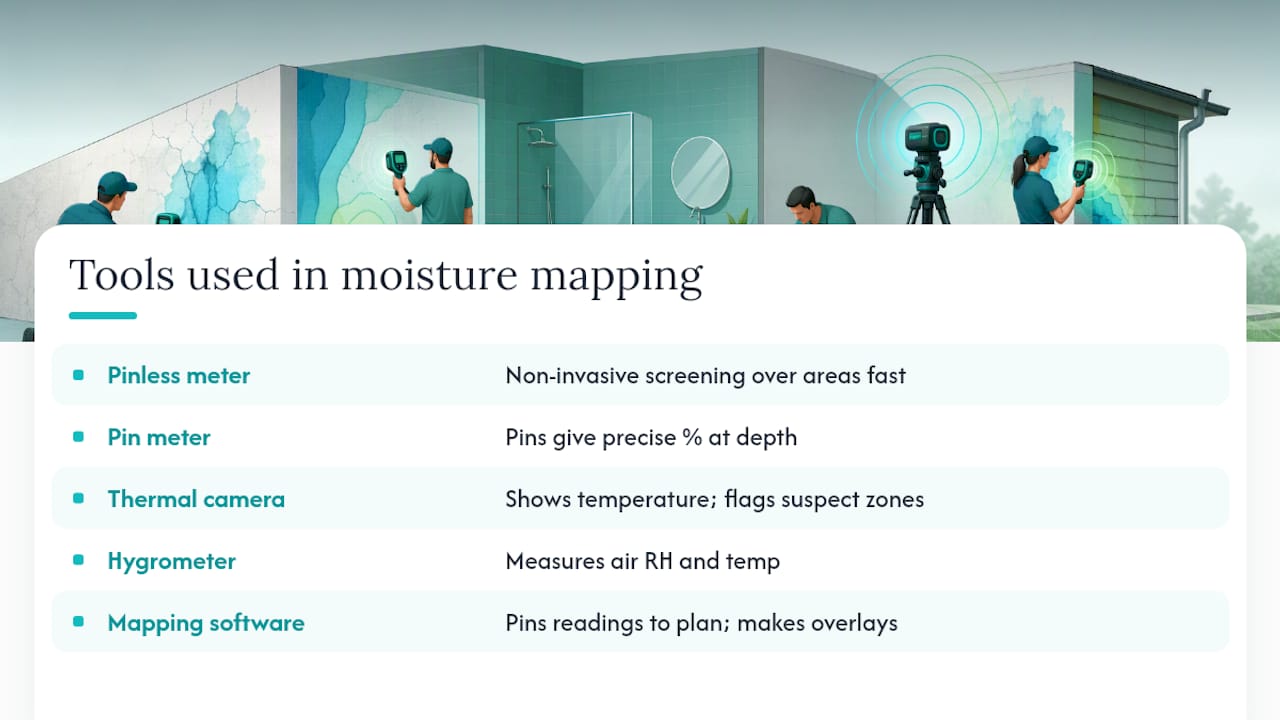
Pin meters push small electrodes into the material to get a precise moisture content reading at a specific depth. Once a pinless scan flags a suspect area, a pin meter confirms the exact percentage and how deep the water has traveled. You need both: pinless for speed and coverage, pin meters for the hard number that goes on the map.
Thermal cameras show temperature differentials on a surface. Wet materials often read cooler than dry surrounding areas because evaporation pulls heat away, so a thermal camera is genuinely useful for spotting suspect zones fast, especially across large ceilings or walls. Here’s the part people misunderstand constantly: thermal imaging doesn’t actually see water. It sees temperature. A cold spot on a thermal camera could be a wet stud, a missing patch of insulation, or a draft from an exterior wall. Every thermal reading has to get confirmed with a moisture meter before it goes on the map as a wet zone.
Hygrometers measure ambient relative humidity and temperature in the air, which matters because drying happens based on the difference between the air and the material, not just the material’s moisture content alone.
Mapping software like magicplan lets technicians pin each reading to a digital floor plan, track how a specific spot’s moisture level changes day over day, and generate color-coded overlays that make a report readable at a glance instead of buried in a spreadsheet.
Pro Tip: If a contractor shows you only a thermal photo as proof of a dry structure, ask for the meter readings that confirmed it. A thermal image alone isn’t a moisture reading, it’s a reason to test.
How Does a Moisture Mapping Inspection Actually Work?
A mapping job follows a fairly consistent sequence, whether it’s a single bathroom leak or a flooded commercial building.
- Visual inspection and hypothesis. The technician walks the space, identifies the likely source (a supply line, a roof penetration, a slab crack), and forms a working theory about which direction the water probably migrated.
- Thermal sweep. A thermal camera scans walls, ceilings, and floors to flag temperature anomalies worth testing, narrowing down where the grid testing needs to focus.
- Grid testing. Using pin and pinless meters, the technician tests systematically across a reference grid, recording each reading’s location, depth, and the date and time it was taken. This isn’t random sampling. Every point gets logged against the same coordinates on later visits.
- Baseline documentation and dry standards. The technician establishes a reference reading from unaffected material in the same structure, which becomes the target the wet areas need to reach. A typical mapping workflow uses this baseline to judge progress rather than an arbitrary universal number.
- Equipment placement. Air movers and dehumidifiers get positioned based on where the map shows moisture, not spread evenly across the room.
- Monitoring and map updates. Technicians return roughly every 24 to 48 hours, retest the same points, and update the map. If a reading isn’t trending down, the drying plan gets adjusted, more equipment, repositioned airflow, or a look at whether trapped moisture behind a wall needs a different approach.
- Invasive testing when needed. If surface readings stay high despite drying equipment running correctly, technicians may need to remove a small section of drywall or flooring to test what’s happening inside a cavity that meters can’t reach from the surface.
Each visit adds another data point to the same map, so what you end up with by the end of the job is a visual timeline of the drying process, not just a snapshot.
How to Read Moisture Readings and Know What’s Actually Dry
Moisture readings come in two flavors: percent moisture content (MC), which measures water weight as a percentage of the material’s dry weight, and relative scales, which some pinless meters use to indicate wet versus dry without giving an exact percentage. Both are useful, but MC is what most dry standards are written against.
Different materials have different dry targets, and treating every surface like it needs to hit the same number is one of the more common mistakes on a job site.
| Material | Typical dry standard | Notes |
|---|---|---|
| Framing lumber | Below typical dry standard percentages | IICRC guidance uses this threshold for structural framing |
| Drywall | Near the dry reference reading for that material | Drywall that stays wet for extended periods often needs replacement rather than drying |
| Hardwood flooring | Within a few points of the pre-loss baseline | Wood flooring can cup or warp even after it reads dry, so visual inspection still matters |
| Concrete slabs | Varies by intended flooring finish | Slabs dry slowly and may need weeks, not days, especially under vinyl or epoxy coatings |
The trend matters more than any single reading. A structure is generally considered dry enough for repairs once readings across the mapped points stay within a couple of points of the dry standard on two consecutive visits, not just one good reading.
What Documentation Do Insurance Adjusters Expect?
Adjusters approve claims faster when the paperwork answers their questions before they ask them. A moisture map is often required documentation on any claim involving significant water damage, because it proves both the extent of the loss and the drying progress over time.
A solid claim packet usually includes:
- Dated moisture logs showing readings at each grid point across every visit
- Photos of visible damage taken at the start of the job and updated as work progresses
- Thermal images used to identify suspect zones, paired with the meter readings that confirmed them
- A map overlay showing where equipment was placed and why
- Reference to the dry standard used for each material type
Those logs are what justify the number of mitigation days and equipment-rental charges on the final invoice. Without them, an adjuster is left taking a contractor’s word for how long drying actually took. If you’re the property owner, ask your restoration company for copies of the map and logs before the job closes, check that the time stamps are legible, and include everything in your claim packet rather than assuming your contractor will submit it automatically. Mapped, time-stamped evidence tends to move through claims review with far fewer follow-up questions than a job with photos alone.
How Infinity Restoration Handles Moisture Mapping on Every Job
Infinity Restoration runs moisture mapping as a standard part of every water damage restoration job in the Orlando area, not an upsell. Crews respond 24/7 and start the mapping process during the initial site visit, before drying equipment goes anywhere.
- On-site technicians build the grid, take baseline readings, and photograph everything before setup begins
- Infinity Restoration keeps a Florida Licensed Mold Assessor on staff, which matters directly for jobs where mapping reveals conditions suggesting hidden mold
- Real-time documentation gets compiled as the job progresses, so claim packets are ready when mitigation wraps instead of assembled after the fact
- Mapping data ties directly into the final verification report confirming the structure met dry standards before repairs began
For commercial properties dealing with larger losses, the same mapping discipline applies at scale through commercial water damage restoration services.
| Point | Details |
|---|---|
| Licensed oversight | A Florida Licensed Mold Assessor is on staff for jobs where mapping reveals hidden mold risk |
| Documentation timing | Real-time logs and photos compiled during the job, not reconstructed after the fact |
Staying Safe: Contamination and Hazard Protocols During Mapping
Moisture mapping puts technicians in direct contact with materials that may carry contaminated water, and the protocols matter as much as the readings themselves. Category 2 water (from appliances or gray water sources) and Category 3 water (sewage backups, flooding) both carry contamination risks that change how a technician approaches testing.
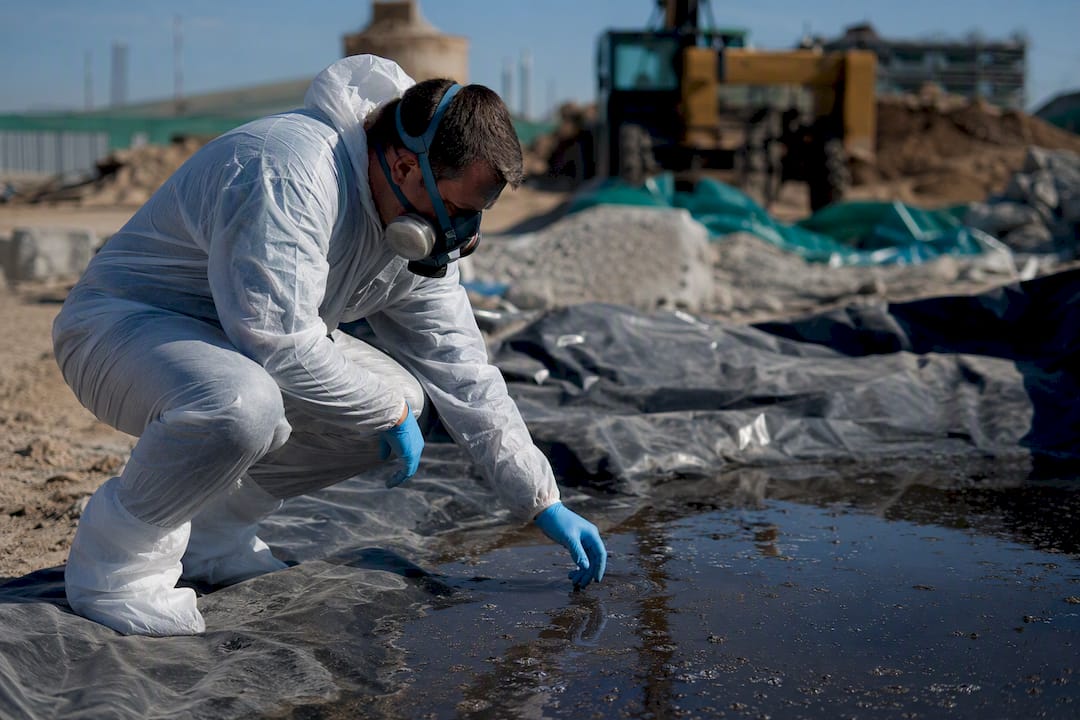
Technicians wear gloves and, on contaminated jobs, respiratory protection before probing walls or flooring with pin meters, since pin testing can release trapped spores or bacteria from behind a wet surface. Equipment gets disinfected between rooms and between properties entirely, because a pin meter that touched contaminated drywall in one room can carry that contamination into an unaffected space if it isn’t cleaned first.
Containment barriers, plastic sheeting sealed around a work area, get set up before invasive testing in any space where mold growth is suspected, keeping spores from spreading into HVAC systems or adjoining rooms. Technicians also avoid cutting into materials without first checking for electrical wiring behind the surface, since a pin meter probe near a live circuit is a real shock hazard.
Anyone walking through a property mid-mapping should stay out of areas marked as contaminated or under containment, and should never handle testing equipment that’s been in contact with sewage-category water. If you’re the property owner watching this process happen in your own home, that’s a normal and necessary part of the job, not overcaution.
Common Problems That Trip Up Moisture Mapping
Not every material cooperates with a moisture meter, and knowing where the readings get unreliable saves a lot of confusion.
Dense or layered materials like tile over concrete, or multiple layers of flooring stacked over decades, can produce inconsistent pin meter readings because the probe only reaches a fixed depth. Technicians often need to test at multiple depths or rely more heavily on pinless scanning across a wider area to get a reliable picture.
False positives happen more often than people expect. Metal lath behind plaster, foil-backed insulation, and even certain paint types can throw off pinless meter readings by interfering with the electromagnetic signal. A reading that looks alarmingly high on one pass sometimes turns out to be the building material itself, not water, which is why confirming with a pin meter at a different location remains standard practice before marking a zone as wet on the map.
New construction moisture confuses readings too. Concrete slabs and fresh drywall mud can carry residual construction moisture that has nothing to do with the current water event, so an experienced technician checks the property’s age and construction timeline before assuming every elevated reading points to the leak in question.
Seasonal humidity swings in Florida can push ambient readings up even in unaffected rooms, which is exactly why a dry reference point from an unaffected area in the same structure matters more than a fixed universal number.
The Real Value Nobody Talks About Enough
Most guides on this topic focus on the tools, pin meters, thermal cameras, software, as if buying the right gear solves the problem. It doesn’t. The instrument matters less than the discipline behind using it consistently, at the same points, on a set schedule, with someone who understands what a reading that refuses to drop actually means.
Where conventional advice falls short is treating moisture mapping like a one-time inspection instead of an ongoing record. A single map tells you where the water is today. A map updated every 24 to 48 hours tells you whether the drying plan is working, and that distinction is what actually protects your claim and your structure. Adjusters aren’t impressed by a thick binder of photos; they’re persuaded by a trend line that shows readings dropping in a straight line toward a documented dry standard.
If you’re a property owner facing this process for the first time, prioritize asking your restoration contractor one question before anything else: how often will you retest, and will I get a copy of the map after every visit. That single habit separates a claim that closes cleanly from one that drags into disputes over scope and duration.
— Nate
Get Professional Moisture Mapping From Infinity Restoration
If you’re dealing with a leak, flood damage, or a claim that needs solid documentation, Infinity Restoration builds moisture mapping into every job from the first visit, not as an optional upgrade you have to request. That means grid-referenced readings, thermal confirmation, and time-stamped logs start the moment technicians arrive, giving you a claim packet that holds up to adjuster scrutiny instead of a pile of loose photos assembled after the fact.
Every job includes a Florida Licensed Mold Assessor’s oversight when hidden moisture raises mold concerns, and real-time documentation means you’re never waiting weeks after the work is done to get proof of what happened. Whether it’s a residential leak or a larger commercial loss, the mapping process runs the same way: systematic, logged, and ready for your insurer. Call for 24/7 emergency water damage restoration or start with commercial water damage restoration if you’re managing a business property, and get a technician mapping your property today.
Sources
- Moisture Mapping in Flood Damage Restoration | Protimeter (industry blog)
- Moisture mapping software | magicplan