

Once the wind dies down, secure any active roof breach with a heavy-duty tarp if it’s safe to get up there, and call an emergency restoration crew immediately if it isn’t. Photograph everything before you touch a thing. A tarp is a temporary fix, not a repair, and the clock on interior water damage starts the moment the storm passes.
TL;DR:
- Use a tarp that’s 3 to 5 feet larger than the damage and fully extend it over the roof ridge for maximum protection.
- Secure the tarp with battens into roof decking and reinforce edges with corrosion-resistant screws spaced every 12 to 24 inches.
- Vinyl tarps with a minimum thickness of 10 to 12 mils last longer in storm conditions, especially when reinforced with proper anchoring methods.
- Avoid tarping in unsafe conditions such as steep roofs over 6/12 pitch, downed power lines, or active storms, and call professionals for such risks.
- A tarp can provide effective temporary protection for 30 to 90 days, but repeated re-tarping indicates the need for permanent repairs.
Table of Contents
- How Do You Handle Roof Tarping After a Storm Safely?
- Step-by-Step Tarp Installation for Storm Damage
- Which Tarp Material and Thickness Actually Hold Up?
- Why Anchoring Method Matters More Than the Tarp Itself
- When Is It Too Dangerous to Tarp the Roof Yourself?
- How Long Can a Tarp Stay on Before You Need a Real Repair?
- What Does Infinity Restoration Bring to Emergency Tarping?
- A Technician’s View: What Actually Separates a Good Tarp Job From a Bad One
- Get Emergency Roof Protection From Infinity Restoration
- Sources
How Do You Handle Roof Tarping After a Storm Safely?
The first hour decides how much damage you’re dealing with by the time repairs actually start. Move fast, but move smart.
Start outside the house, not on the roof. Walk the perimeter and look for hazards like downed power lines, leaning trees, or structural roof issues. Any of those means you stop and call a professional instead of grabbing a ladder. If it’s safe to proceed, shut off electricity to any room with active water intrusion, especially near light fixtures or outlets.
Inside, get buckets under leaks and move furniture, electronics, and anything irreplaceable out of the drip zone. Then document. Photograph every room with visible water, every stain on the ceiling, and the exterior damage from multiple angles before you cover anything.
If you’re attempting tarping yourself, gather materials now:
- A tarp sized well beyond the damaged area (more on sizing below)
- 2×4 boards for battens
- Corrosion-resistant deck screws
- A cordless drill, tape measure, and a stable ladder
- A second person. Never do this alone.
If the decking underneath feels soft, bounces, or you can see daylight through the roof from inside the attic, stop. That’s a structural issue, not a tarping job.
Step-by-Step Tarp Installation for Storm Damage
Once you’ve confirmed it’s safe to work on the roof, the process follows a specific order. Skipping steps is how tarps fail in the next windstorm.
- Measure the damage. Add 3 to 5 feet of overlap on every side of the breach. Sizing rules recommend extending the tarp well past the visible damage so water can’t creep under the edges. If the damage sits near or over the roofline, route the tarp fully over the ridge and let it drape down the opposite slope. One continuous tarp beats two overlapped pieces almost every time.
- Clear debris. Sweep off branches, shingle fragments, and loose granules. Sharp debris under a tarp wears through the material fast.
- Photograph the bare damage. Do this before the tarp goes on, not after. Insurers want to see the “before.”
- Position and unroll. Lay the tarp flat, centered over the breach, and smooth out wrinkles that could pool water.
- Anchor at the ridge first. Wrap the top edge around a 2×4 batten and screw the board down into the roof decking, not just the shingles. Fastening battens into decking spreads the load and keeps the tarp from tearing at the grommets. Anchoring the top edge first also keeps wind from getting underneath and turning the whole tarp into a sail.
- Work downward. Add battens along the sides and bottom edge, using corrosion-resistant screws spaced roughly every 12 to 24 inches. Never rely on nails through the tarp fabric alone.
- Tension and reinforce. Check for slack, then add rope tie-downs or sandbags at the corners for redundancy. Pay close attention to chimneys and vent collars. Tarps tear fastest where they have to bend around an obstacle.
Pro Tip: Cut a small relief slit near a low corner if water tends to pool there. A tiny controlled opening beats a tarp that balloons and rips in the next gust.
Which Tarp Material and Thickness Actually Hold Up?
Not every blue tarp from the hardware store is built for storm duty. Material choice determines whether your temporary fix lasts three days or three months.
Vinyl tarps handle high-wind and coastal exposure best. They cost more, but they resist tearing and UV breakdown far longer than lighter materials. Reinforced polyethylene works fine for general storm damage and costs less, which makes it the practical pick for most inland homes. Skip the thin blue camping tarps entirely. Heavy-duty waterproof construction matters more than price here, and a lightweight tarp will shred in the first real gust.
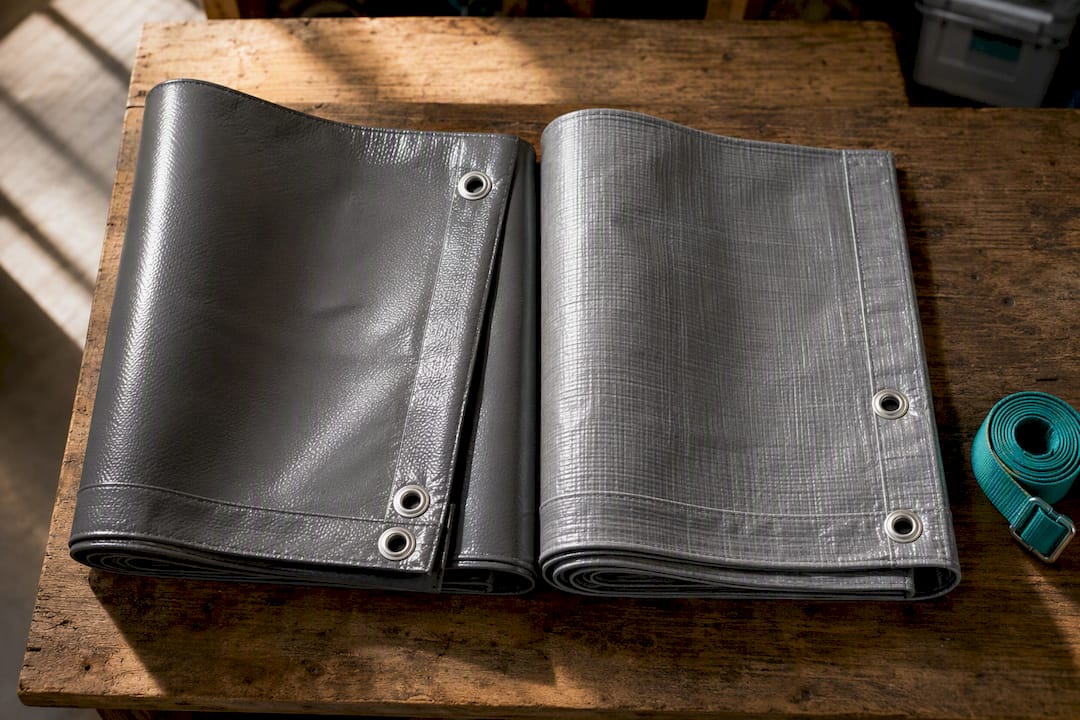
Look for a minimum of 10 to 12 mil thickness for emergency roof use. Buy oversized rather than exact. You want that 3 to 5 foot overlap on every side, and if you’re forced to seam two tarps together, overlap them by at least 8 inches and tape the seam.
Hardware matters as much as the tarp itself:
- 2×4 boards for battens (buy more than you think you need)
- Corrosion-resistant deck screws or wound cap nails
- Heavy-duty rope for tie-downs
- Bungee cords or elastic shock cords
- Sandbags for corner weighting
Secondary water damage from an uncovered roof can run 2 to 3 times the cost of the original storm damage, which is the real reason material quality isn’t a place to cut corners.
Why Anchoring Method Matters More Than the Tarp Itself
A great tarp with weak anchoring still fails. Wind doesn’t rip through vinyl. It rips through grommets and staple points that weren’t designed to take repeated gusts.
Wrapping the tarp edge around a batten before fastening spreads the pulling force across the whole board instead of concentrating it on a few holes. That’s why the batten method holds up where staples and bungee-only setups don’t.
For added wind resistance, elastic shock-cord systems paired with tie-downs outperform rigid rope in gusting conditions. Elastic tie-down systems reduce shock loads on the tarp by roughly 60 to 70 percent compared with rigid anchoring, which means far fewer torn grommets after the next front rolls through.
- Reinforce corners with doubled batten wraps rather than a single screw point
- Avoid rigid metal tie-downs at corners. They concentrate stress instead of absorbing it
- Inspect the tarp right after installation, again the next day, and after every subsequent wind event
Pro Tip: Keep a spare batten and a handful of screws in the garage. Re-tensioning a loose edge takes ten minutes if you catch it early, and hours of interior cleanup if you don’t.
When Is It Too Dangerous to Tarp the Roof Yourself?
Some conditions turn a routine repair into a genuine safety risk. Knowing the line matters more than knowing the technique.
Call a professional crew instead of climbing up if you see any of these:
- The roof deck feels soft, sags, or shows daylight from inside the attic
- The pitch is steeper than 6/12, or the ladder can’t reach safely
- The home is multiple stories, or the damaged section overhangs a drop
- Heavy debris (fallen limbs, chimney sections) is resting on the roof
- Power lines are down anywhere near the property
- Weather is still active. Lightning or hurricane-force wind means no one goes on the roof, period
Nailing into decking that’s already compromised can make a small breach much larger, and walking on wet or storm-damaged shingles is one of the fastest ways to fall through. A trained crew brings proper rigging, fall protection, and code-compliant materials, plus documentation that insurance adjusters trust more readily than homeowner photos alone.
How Long Can a Tarp Stay on Before You Need a Real Repair?
A well-installed tarp buys you time. It doesn’t buy you forever.
Expect roughly 30 to 90 days of reliable protection before UV exposure, wind fatigue, and sun bleaching start breaking the material down. Guidance across the industry treats that window as the outer edge of safe temporary coverage, not a target to aim for. If you’re patching the same tarp for the third time, that’s your signal to schedule permanent repairs now rather than later.
Document at four points: before covering the damage, immediately after installation, the next day, and after every subsequent storm. Insurers routinely ask for timestamped photos and contractor receipts before approving claims, so keep a folder, not a scattered camera roll.
- Save every receipt for materials and any contractor estimate you get
- Note the date and time on each photo set
- Get a written estimate for permanent repair as soon as the tarp is secure, not after the second re-tarp
Repeated retarping after multiple storms is one of the clearest signs a temporary fix has quietly become a permanent one, and that’s usually where secondary damage claims start piling up.
What Does Infinity Restoration Bring to Emergency Tarping?
DIY tarping works for straightforward, low-pitch damage when conditions are safe. For anything more complicated, a trained crew changes the outcome.
Some restoration companies operate with 24/7 emergency response, which matters when a breach happens at 2 a.m. during an active front. Some teams use advanced moisture mapping to catch water intrusion that isn’t visible yet, and employ licensed mold assessors, since a tarp that goes up late is often the difference between drying out a ceiling and remediating mold in it.
- Code-compliant temporary repairs
- Photo and moisture documentation for insurance claims
- Rapid deployment to limit exposure time of interior spaces
- A team with community presence and service experience
Hiring a certified crew can sometimes help with claim approval, since adjusters may weigh professional documentation more heavily than homeowner photos.
A Technician’s View: What Actually Separates a Good Tarp Job From a Bad One
Most tarp failures I’ve seen trace back to two things: skipping the batten anchoring for speed, and waiting too long to schedule the permanent repair because the tarp “seemed fine.” Neither mistake shows up until the next storm hits. Document everything, anchor properly the first time, and treat the tarp as a countdown clock, not a solution.
— Nate
Get Emergency Roof Protection From Infinity Restoration
A tarp bought at the hardware store only goes as far as the person installing it. If your roof damage involves a steep pitch, structural concerns, or active water intrusion you can’t stop from inside, a restoration company with 24/7 emergency response can send a trained crew to perform code-compliant temporary repairs and provide documentation useful for insurance claims.

Moisture mapping can catch water damage that standard inspections miss, which matters most in the days right after a storm when hidden leaks turn into mold problems. If your roof is actively leaking or you’re unsure whether it’s safe to climb up there yourself, request emergency water damage restoration now, or check the emergency services page for immediate response in the Orlando area.
Sources
- How to Tarp a Roof – Humphrys
- What to know about tarping a roof – GAF
- How to tarp a roof – Lowe’s
- Emergency Tarp Setup Checklist for Storms & Hurricanes – Tarpsupply
- Emergency roofing – Guy Roofing