

Most contained residential water losses finish structural drying in about 3 to 7 days, with full repairs adding another 1 to 4 weeks depending on severity. Water category, IICRC class, and how fast mitigation starts all shift that window. The single biggest variable is response speed: crews who arrive and start extraction inside the first 24 to 48 hours cut both mold risk and total downtime dramatically.
TL;DR:
- Starting extraction within the first 24 to 48 hours is crucial to reducing mold risk, total downtime, and the need for extensive remediation.
- Structural drying times vary from two to 14 days depending on the water damage class, with proper moisture measurement being essential for accurate assessment.
- Effective documentation, including daily moisture logs and photos, speeds up insurance claims and prevents disputes over damage or costs.
- Skipping moisture measurements before demolition can lead to unnecessary and costly destruction, emphasizing the importance of drying in place when possible.
- An immediate 24/7 emergency response, with moisture mapping completed at hour one, significantly shortens cycle times and prevents further damage.
Table of Contents
- The First 48 Hours of the Water Damage Timeline
- How Long Does Structural Drying Take?
- When Does Cleaning and Contents Work Happen?
- How Long Do Repairs and Reconstruction Take?
- What Factors Change the Water Damage Recovery Timeline?
- What Can You Do to Speed Up Water Damage Restoration?
- Why Documentation Speeds Up Insurance Claims
- How Infinity Restoration Documents the Recovery Process
- What Contractor Red Flags Should You Watch For?
- Get an Emergency Response Started
- Sources
The First 48 Hours of the Water Damage Timeline
What happens in the opening hours of a water loss determines almost everything that follows. This window is where the water damage restoration process either gets ahead of the damage or falls behind it.
Hours 0 to 4 are about triage. A crew checks electrical safety, shuts off the water source, and starts photographing every affected surface before anything gets moved or torn out. Moisture mapping begins here, too. Technicians use meters to trace how far water has traveled behind walls and under flooring, which is what separates a guess from an actual scope of work.
Hours 4 to 24 cover the bulk of standing water removal. Extraction equipment pulls out what it can, containment barriers go up to stop cross contamination, and air movers and dehumidifiers get positioned. Daily moisture logs start on day one, not day three.
Hours 24 to 48 matter more than any other stretch on this list. The EPA notes mold can begin colonizing damp materials within 24 to 48 hours, which is why:
- Category 2 (gray water) and Category 3 (black water) losses require stricter PPE and containment than clean water losses
- Materials that stayed wet past this window often need antimicrobial treatment even if they’re structurally salvageable
- Delayed response past 48 hours frequently adds a full remediation phase that a faster start would have avoided
Independent restoration timelines generally track this same hour-to-day structure, and it lines up with what Consumer Reports recommends for homeowners confronting the early signs of water damage on their own.
How Long Does Structural Drying Take?
Drying duration depends on the IICRC class assigned to the loss, a framework defined in the IICRC S500 standard that governs how professionals inspect, extract, dry, and clean a water-damaged structure.
- Class 1: Limited water absorption, affecting part of one room. Usually dries in 2 to 3 days.
- Class 2: Water has wicked into carpet, pad, and some wall material up to 24 inches. Typically 3 to 5 days.
- Class 3: Water came from overhead, saturating walls, insulation, and ceilings. Commonly 5 to 7 days.
- Class 4: Water trapped in low-permeability materials like hardwood, plaster, or concrete. Often stretches to 7 to 14 or more days.
Pro Tip: Ask your crew what “dry standard” means for your specific materials. Drywall and hardwood don’t dry to the same benchmark, and a tech should be measuring against the material’s own dry baseline, not a generic number.
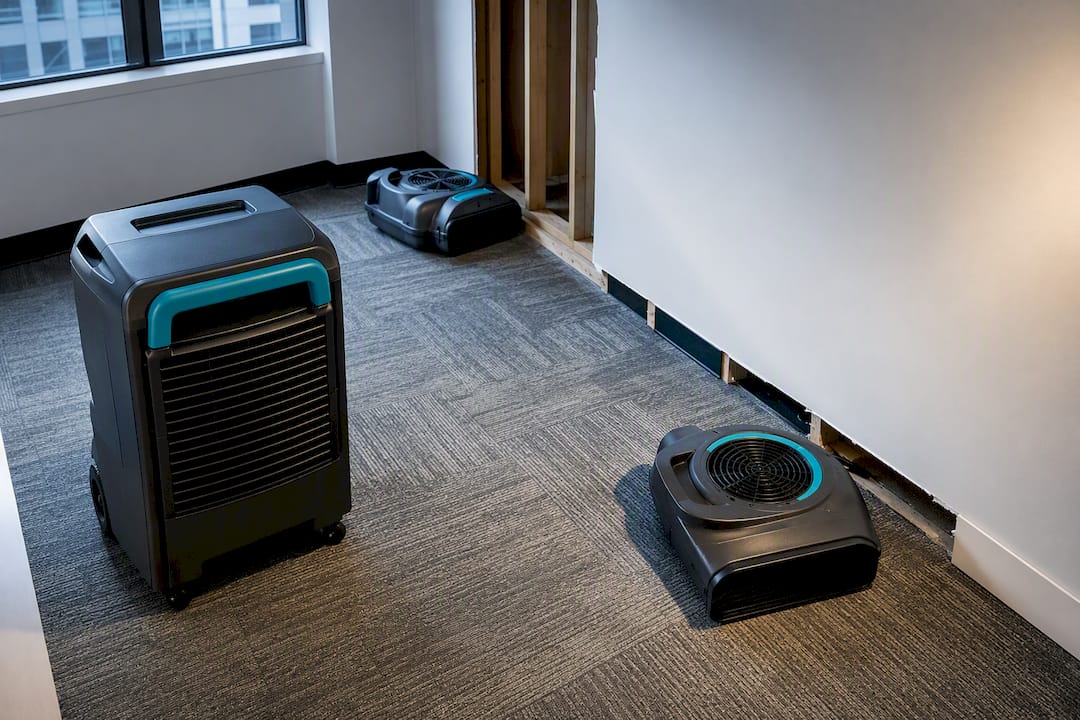
Air movers create airflow across wet surfaces to speed evaporation. Low-grain-refrigerant (LGR) dehumidifiers pull that moisture out of the air, and desiccant units handle it in colder or larger commercial spaces where LGR units lose efficiency. Daily psychrometric readings, temperature, humidity, and moisture content in the material itself, tell the crew whether equipment is working or just running up hours. That daily log is also what proves the job is actually done, not just quiet.
When Does Cleaning and Contents Work Happen?
Antimicrobial treatment usually overlaps with the tail end of drying rather than waiting for it to finish completely. Once surfaces are dry enough to treat without trapping moisture underneath, cleaning can start.
Contents get sorted into three lanes:
- Clean in place: Furniture and hard-surface items that didn’t take on standing water, cleaned on site within a day or two.
- Pack-out: Items moved offsite for specialized cleaning, often returned within 1 to 3 weeks depending on volume.
- Dispose: Porous items exposed to contaminated water, especially in Category 3 losses, that can’t be safely restored.
Document restoration and specialty textile cleaning tend to add the most time to this phase, sometimes extending contents timelines well past the structural drying window.
How Long Do Repairs and Reconstruction Take?
Reconstruction can’t start until moisture readings confirm the structure has hit dry standard. That gate matters. Rebuilding over damp framing just buries the problem.
Once drying is confirmed, timelines split sharply by scope:
- Cosmetic repairs (drywall patches, paint, baseboard): Often 3 to 7 days.
- Moderate repairs (flooring replacement, partial drywall, cabinetry): Typically 1 to 3 weeks.
- Full rebuilds (kitchens, multiple rooms, structural framing): Commonly 3 to 8 weeks or longer.
Permits add lead time in most municipalities, and custom materials like matched hardwood or specific cabinetry finishes can stall a project for weeks on their own. Subcontractor scheduling and insurance approval timing are the other two common bottlenecks, and they often run in parallel rather than in sequence when a project is managed well.
What Factors Change the Water Damage Recovery Timeline?
Water category and damage class set the baseline, but several other variables push the timeline in either direction.
Factors that influence the water damage recovery timeline include water category (clean, gray, or black), presence of hidden cavities behind cabinetry or walls, size and access of the affected area, ambient weather and humidity conditions, and the speed of response by restoration crews.
What Can You Do to Speed Up Water Damage Restoration?
While waiting for a crew, there’s a short list of safe, useful actions and a shorter list of things to avoid.
- Shut off water at the source and cut power to affected circuits if it’s safe to reach the panel.
- Photograph every damaged area before moving anything.
- Move undamaged items and furniture out of the affected space.
- Use a wet/dry vacuum on standing water only if outlets and cords are clear of the water line.
- Leave glued-down flooring, drywall, and cabinetry alone. Don’t cut into walls without a technician’s guidance.
- Skip household box fans for extended runs. They’re not built for continuous use and can overheat.
Pro Tip: Photograph wide shots of the whole room first, then close-ups of specific damage, and label each image with the date and location. Keep every receipt for temporary lodging, equipment rental, or emergency repairs in one folder. Adjusters move faster when the file is organized before they ask for it.
The FEMA guide to safe cleanup after flooding covers additional safety checks worth reviewing before you touch anything in a flooded space. And if you’re weighing a repair yourself, the pitfalls of DIY door replacement are a useful reminder that swapping in new materials without proper prep often costs more to fix later.
Why Documentation Speeds Up Insurance Claims
A well-built mitigation file is the difference between an adjuster approving a scope in days versus weeks. That file typically includes daily moisture logs, dated photos, an equipment count with run hours, and a scope written in a format adjusters recognize, often Xactimate-aligned line items.
- Daily logs show the trajectory of drying, not just a single snapshot
- Photo documentation from hour one protects against disputes over pre-existing damage
- Equipment run hours justify the mitigation invoice line by line
- Well-documented mitigation files reduce back-and-forth between contractor and insurer, which is often what actually delays reconstruction start dates
Ask your crew for copies of daily logs as the job progresses, not just a final report. Keep your own folder of every email and call with your adjuster. That paper trail is leverage if a claim stalls.
How Infinity Restoration Documents the Recovery Process
Moisture mapping and daily psychrometric logs aren’t optional extras. They’re how a mitigation job proves it follows the drying principles laid out in the IICRC S500 standard instead of just running fans until things looked dry.
- Having a Florida Licensed Mold Assessor on staff means mold concerns get evaluated by someone credentialed to make that call, not guessed at
- 24/7 emergency response matters because the mold-risk clock starts the moment water hits a surface, not when a crew happens to be available
- Real-time documentation, photos, logs, and equipment tracking, gives adjusters exactly what they need to move a claim forward without repeated follow-up requests
This is the same emergency response and moisture-mapping workflow used across residential and commercial losses, built around the idea that a well-documented job protects the property owner as much as it protects the timeline.
What Contractor Red Flags Should You Watch For?
The biggest red flag in this industry is a crew that wants to demolish first and measure later. If a technician proposes ripping out drywall or flooring before taking a single moisture reading, ask why. Drying in place, when materials are structurally sound, is often the right technical call, not a shortcut. Unnecessary demolition tends to inflate cost more than it saves time.
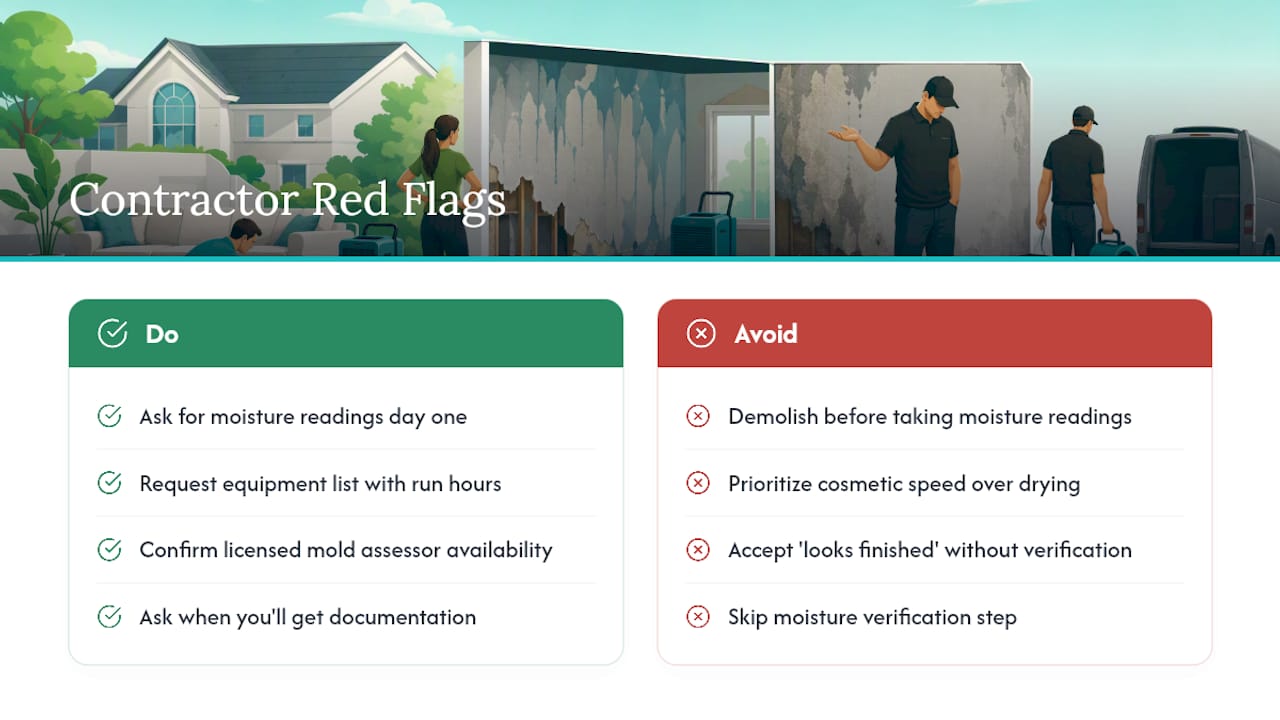
When a crew arrives, ask for their moisture readings on day one, a list of equipment deployed with run hours, and whether a licensed mold assessor is available if contamination is suspected. Ask when you’ll receive documentation, not just a final invoice.
Speed matters in this business, but documented drying should always outrank cosmetic speed. A job that looks finished in three days but skipped the moisture verification will cost more the second time around, and there’s usually a second time when that step gets skipped.
— Nate
Get an Emergency Response Started
A 24/7 emergency response service backed by moisture mapping can pinpoint exactly how far water traveled before floors and walls even look wet. That’s the edge over waiting on a slower callback: the drying plan starts on hour one, not day two.
The first dispatch typically includes a full moisture assessment, initial extraction, and photo documentation that becomes the backbone of the insurance file from the start, not something assembled after the fact. If you’re dealing with active water damage right now, contact Infinity Restoration’s 24/7 water damage team or reach out through the commercial emergency response line if the property is a business. The sooner mitigation starts, the shorter every stage after it gets.
Sources
- IICRC S500
- EPA — A brief guide to mold, moisture, and your home
- FEMA — Stay safe cleaning after a flood
- Consumer Reports — Signs of water damage in your home
- Gateway — Water damage timeline