
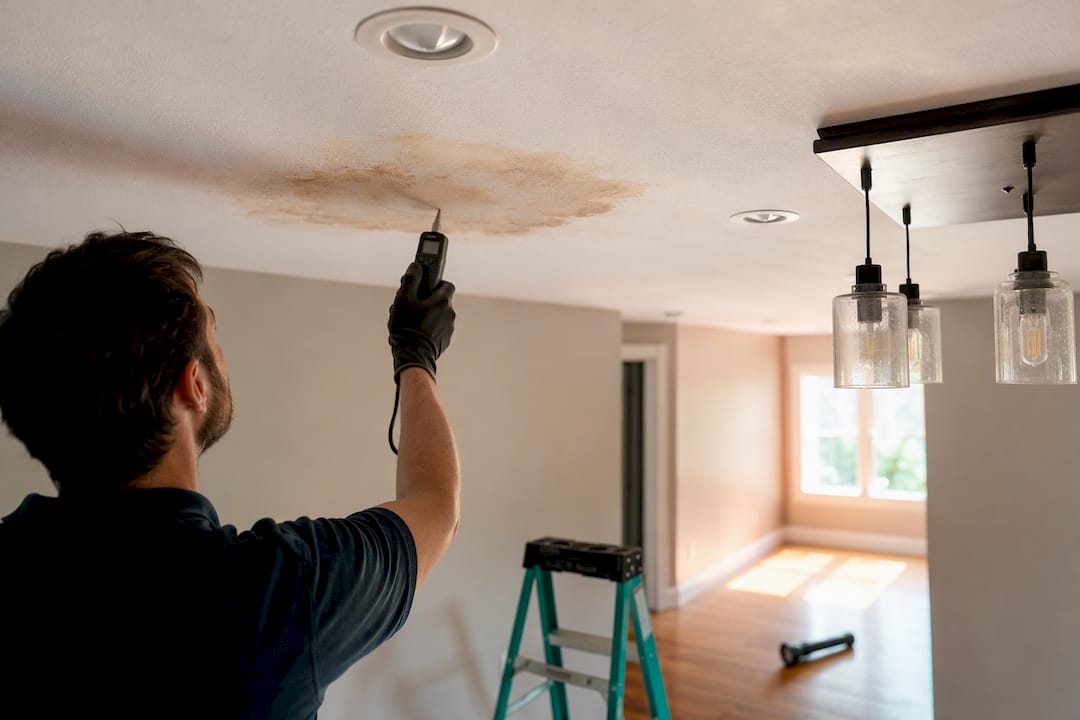
If you’re staring at a wet or sagging ceiling, here’s the verdict: stop the water source, get people and valuables clear, document everything with photos, and start drying within hours, not days. Every minute you wait raises the odds of mold, structural damage, and a bigger repair bill.
Work through this checklist before you do anything else:
- Shut off the water supply if the leak is plumbing-related, or call an emergency roofer if it’s coming from above.
- Move furniture, electronics, and valuables away from the drip zone.
- Set a bucket or tarp under active drips to catch runoff.
- Cut power to any light fixture or outlet in the wet area at the breaker box.
- Call a restoration company like Infinity Restoration immediately if the ceiling is sagging, the leak is large, or you can’t identify the source.
Pro Tip: Never stand directly under a bulging or sagging section of ceiling. A saturated drywall panel can hold gallons of water and let go without warning.
Key Takeaways
Fast action within the first 24 to 72 hours, not the size of the initial stain, is what determines whether a water damaged ceiling stays a small repair or becomes a full remediation job.
| Point | Details |
|---|---|
| Act within hours | Stop the water source, cut power to wet fixtures, and start drying immediately, not the next day. |
| Classify severity first | Firm drywall means minor damage; sagging, sponginess, or mold means it needs a professional. |
| Trace the stain’s location | Top-floor stains usually mean roof or attic issues; stains below bathrooms usually mean plumbing. |
| Don’t paint over an unresolved leak | Confirm the source is fixed and the cavity is dry before applying primer or paint. |
| Call Infinity Restoration for major damage | Their moisture mapping and 24/7 response help Orlando homeowners catch hidden moisture and streamline insurance documentation. |
Table of Contents
- How Serious Is Your Ceiling Water Damage?
- What’s Actually Causing the Leak?
- The First Few Hours: Your Damage Control Checklist
- Repairing a Water Damaged Ceiling by Severity
- When to Call a Restoration Professional
- How Restoration Pros Actually Evaluate Ceiling Damage
- Stop the Next Leak Before It Starts
- A Restoration Provider’s Take on Homeowner Mistakes
- Get Help Fast When the Damage Is Beyond DIY
- Sources
How Serious Is Your Ceiling Water Damage?
Not every water stain means a five-figure repair. Ceiling water damage generally falls into three buckets, and figuring out which one you’re dealing with tells you whether to grab a paint roller or call in a crew.
Minor damage looks like a dry, discolored ring with drywall that still feels firm when you press on it. Moderate damage shows paint bubbling, a soft spot you can feel give slightly, or a stain that’s grown since you last checked. Severe damage means visible sagging, a wide wet area, a musty smell that won’t go away, or insulation you can see is soaked through the drywall seams.
Here’s what to check with your hand and your eyes:
- Press gently on the stained area. Firm means minor; give or sponginess means moderate to severe.
- Look for bubbling or peeling paint, a sign moisture is trapped behind the surface.
- Smell for mustiness, which often shows up before mold is visible.
- Check for sagging, bulging, or a stain that’s spreading outward.
Surface appearance can be deceiving. Restoration professionals rely on moisture meters and thermal imaging because a ceiling can look dry on top while the cavity above stays soaked for days. That gap matters because mold can begin forming on wet building materials within 24 to 72 hours, and the industry classifies damage from Class 1 (surface moisture) to Class 4 (deep saturation into structural materials). If your stain is more than a day or two old and you haven’t confirmed the cavity is dry, assume it isn’t.
What’s Actually Causing the Leak?
A brownish, irregular stain almost always means water traveled down from somewhere above the ceiling, and the shape and location of that stain usually point to the source. The usual suspects are a roof leak or failed flashing, a plumbing line or fixture on the floor above, a clogged HVAC condensate line, or plain condensation from poor attic ventilation.
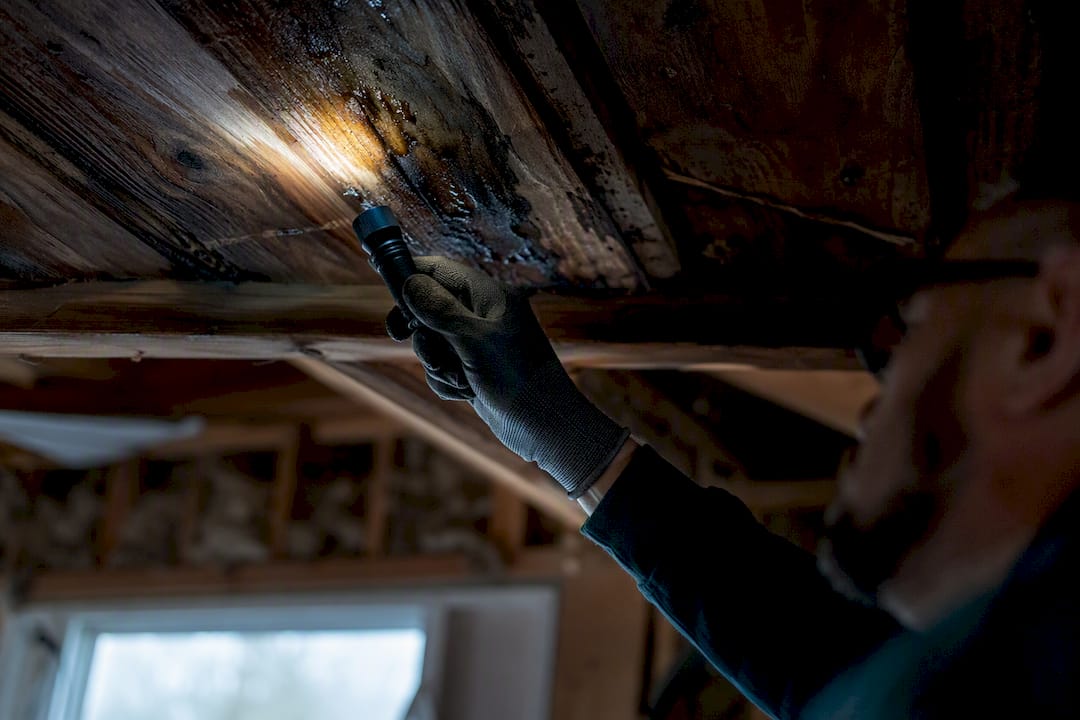
Location is your best clue. A stain on a top-floor ceiling under a roof valley usually traces back to flashing or shingles. A stain directly below a bathroom or kitchen almost always means a plumbing leak. A straight-line stain running along a ceiling often follows a duct or joist, which points to condensation or a slow HVAC drip. Stains on lower-level ceilings typically point to plumbing or HVAC lines rather than the roof, which narrows your search fast.
If it’s safe to do so, check the attic for damp insulation or daylight coming through the roof deck, and inspect your gutters after the next rain. Clogged gutters back water up under shingles more often than homeowners expect.
The First Few Hours: Your Damage Control Checklist
Once you know roughly where the water is coming from, work through these steps in order:
- Stop the source. Shut off the water main for plumbing leaks, or tarp the roof if it’s safe to access and rain is still falling.
- Contain what’s already inside. Buckets, towels, and a tarp over furniture buy you time.
- Relieve dangerous pooling. If a section of ceiling is bulging with trapped water, carefully puncture a small hole at the lowest point with a screwdriver, into a bucket, rather than letting it collapse on its own.
- Cut power to wet fixtures. Wet drywall next to live wiring is a shock and fire risk.
- Start drying. Run fans and a dehumidifier on the affected room, and open attic access if it’s safe to do so.
Home Depot’s repair guidance is direct on this point: don’t paint over a stain until you’ve confirmed the leak is fixed and the area is fully dry. Photograph the damage from multiple angles with a timestamp, and save receipts for any emergency repairs since insurers usually want that paper trail.
Pro Tip: If you smell strong mustiness, see active sparking, or the ceiling is visibly bowing downward, stop what you’re doing and get everyone out of the room. That’s a job for professionals, not a weekend project.
Repairing a Water Damaged Ceiling by Severity
Your repair path, and your budget, depends entirely on which severity bucket you landed in above.
For minor damage, once you’ve confirmed the source is fixed and the area is dry, the fix is cosmetic: a stain-blocking primer followed by matching paint. This is a legitimate weekend DIY job for most homeowners, and industry cost guides put minor cosmetic fixes in the range of a few hundred dollars.
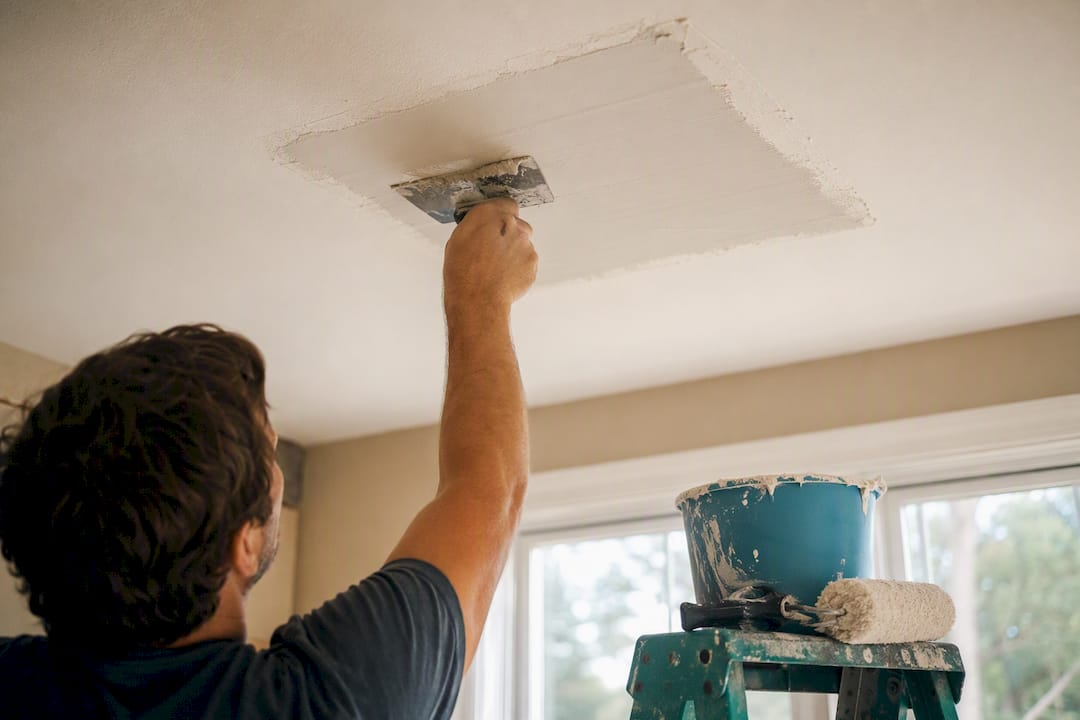
Moderate damage usually means cutting out the affected drywall section, replacing any wet insulation behind it, then taping, mudding, and texture-matching the patch. Matching orange-peel, knockdown, or popcorn texture is harder than it looks and is where a lot of DIY repairs go sideways. Costs for moderate jobs typically land in the low thousands once materials and labor are factored in.
Severe damage is a different animal entirely: sagging framing, saturated insulation across a wide area, or visible mold call for structural repair, full cavity drying with industrial equipment, and often professional mold remediation. These jobs can run into the multiple thousands depending on square footage and how far the water traveled.
Use this quick test to decide which path you’re on:
- Press the drywall. If it flexes or crumbles, it needs replacement, not patching.
- Check insulation. If it’s compressed or wet, it has to come out.
- Look for mold. Any visible growth means the repair plan needs a remediation step, not just a repaint.
When to Call a Restoration Professional
Some situations are worth handling yourself. Others aren’t, and knowing the difference protects both your home and your health.
Call a restoration company when you see sagging drywall, wet insulation, visible mold, an unknown leak source, damage covering more than roughly 10 square feet, any electrical involvement, or a musty smell that lingers after the area has dried. These aren’t judgment calls where DIY confidence should override caution.
When vetting a contractor, ask about:
- IICRC certification and an active state contractor license.
- Moisture-mapping equipment and a 24/7 emergency response window.
- Proof of insurance and recent customer reviews.
- Their mold testing and remediation plan if contamination is suspected.
- How they document readings and photos for your insurance claim.
Pro Tip: Ask any contractor how long full cavity drying will take before repairs start. If the answer is “we’ll patch it today,” that’s a red flag. Rushing repairs before the cavity is verified dry is exactly how homeowners end up paying for the same ceiling twice.
A reputable company should coordinate directly with your insurer, using moisture maps and time-stamped documentation to speed the claim rather than leaving you to translate technical findings yourself.
How Restoration Pros Actually Evaluate Ceiling Damage
Surface dryness is not the same as cavity dryness, and that distinction is why professionals don’t rely on a hand test alone. They use penetrating moisture meters and thermal imaging cameras to map how far water traveled inside the wall and ceiling cavity, often finding wet zones well beyond the visible stain.
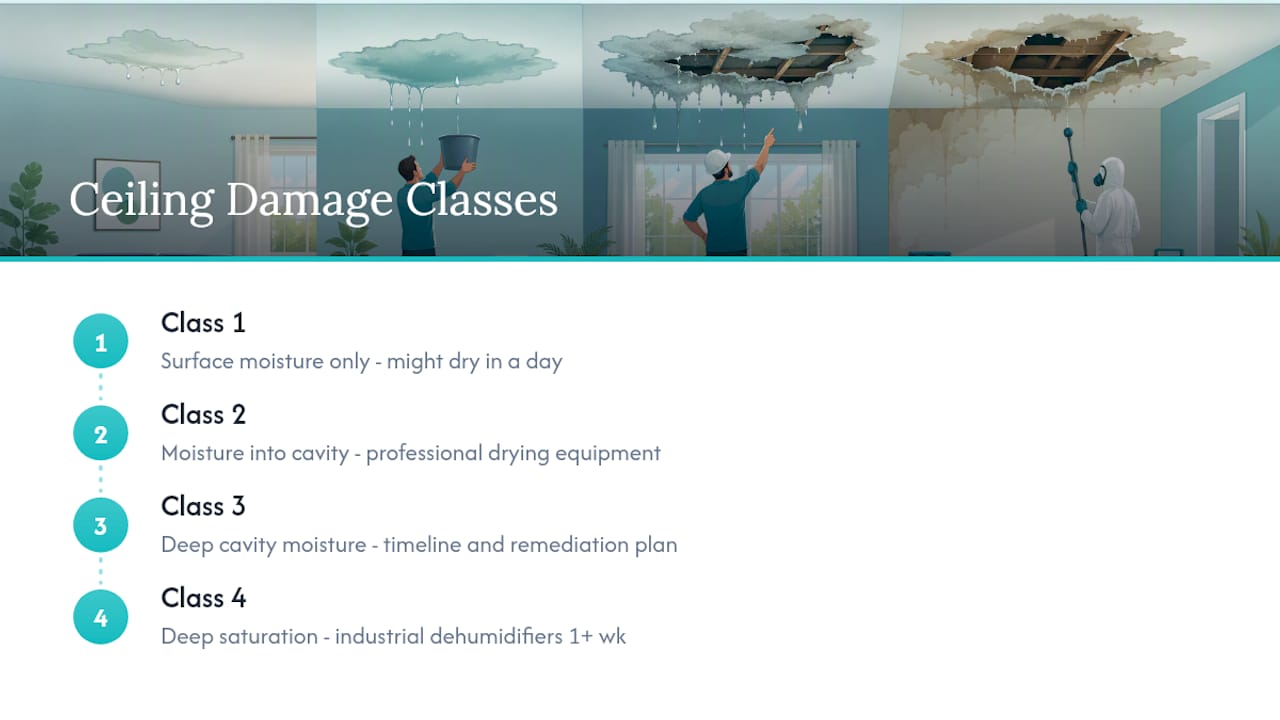
That mapping feeds into a classification system running from Class 1 (surface moisture only) to Class 4 (deep saturation into structural materials), which determines the drying equipment, timeline, and remediation plan the job actually needs. A Class 1 job might dry in a day with a fan. A Class 4 job can require industrial dehumidifiers running for a week or more.
Every reading gets logged with photos and timestamps, partly for quality control and partly because that documentation becomes the backbone of your insurance claim.
Stop the Next Leak Before It Starts
Most ceiling leaks trace back to deferred maintenance rather than bad luck. Roofs, gutters, and HVAC systems degrade slowly, and small problems announce themselves quietly long before a stain shows up on your ceiling.
Walk your roofline twice a year, ideally in spring and fall, looking for lifted or missing shingles and cracked flashing around vents, chimneys, and skylights. Routine visual inspection of roof penetrations and flashing is one of the most cost-effective ways to catch failure points early, before a small gap turns into a soaked attic.
Clean your gutters at least twice a year, more often if you have overhanging trees. Clogged gutters back water up under roof edges, which is one of the most common and preventable causes of ceiling stains after a heavy rain.
Inside the house, check your HVAC drip pan and condensate line for clogs each spring before cooling season ramps up, and make sure attic ventilation is adequate to prevent condensation from building up on the underside of your roof deck. If you’ve had any past leak, keep an eye on that same spot; repaired areas without full cavity drying sometimes leak again in the same location.
A partner resource worth bookmarking if you want a broader restoration perspective is Pure Resto, which covers general emergency restoration practices useful for comparing standards across regions. And if you’ve had water intrusion in walls as well as your ceiling, it’s worth reading up on signs of hidden water damage in walls, since the two problems often show up together.
A Restoration Provider’s Take on Homeowner Mistakes
The two mistakes I see most often are painting over a stain before the leak is actually fixed, and assuming a ceiling that feels dry to the touch is dry all the way through the cavity. Neither shortcut saves money. Fast, documented mitigation in the first day or two is almost always what keeps a ceiling repair small instead of turning it into a full remediation job.
Get Help Fast When the Damage Is Beyond DIY
Infinity Restoration runs 24/7 emergency response across the Orlando area, using moisture mapping to find water your eyes can’t see before it turns into a bigger repair. That matters most in the first 48 hours, when the difference between a patched drywall panel and a full ceiling rebuild often comes down to how fast drying starts.

The team includes a Florida Licensed Mold Assessor, so if your ceiling leak has already crossed into visible mold or a musty smell that won’t quit, testing and remediation happen under one roof instead of a chain of separate calls. Infinity Restoration also documents every moisture reading and photo in real time, which insurance adjusters can use directly rather than relying on your own notes.
If your ceiling is sagging, the leak source is unclear, or you just want a second opinion before you commit to a patch job, request a free estimate for water damage restoration or call for emergency service today. For larger commercial ceiling incidents, Infinity Restoration’s commercial restoration team handles multi-room moisture mapping and documentation at scale.
Sources
- Have water stains on your ceiling? Here are 4 causes and how to fix them
- Water stains on the ceiling: common causes and solutions — BobVila
- How to repair a water-damaged ceiling — The Home Depot
- What to do if you find ceiling water damage | Forbes